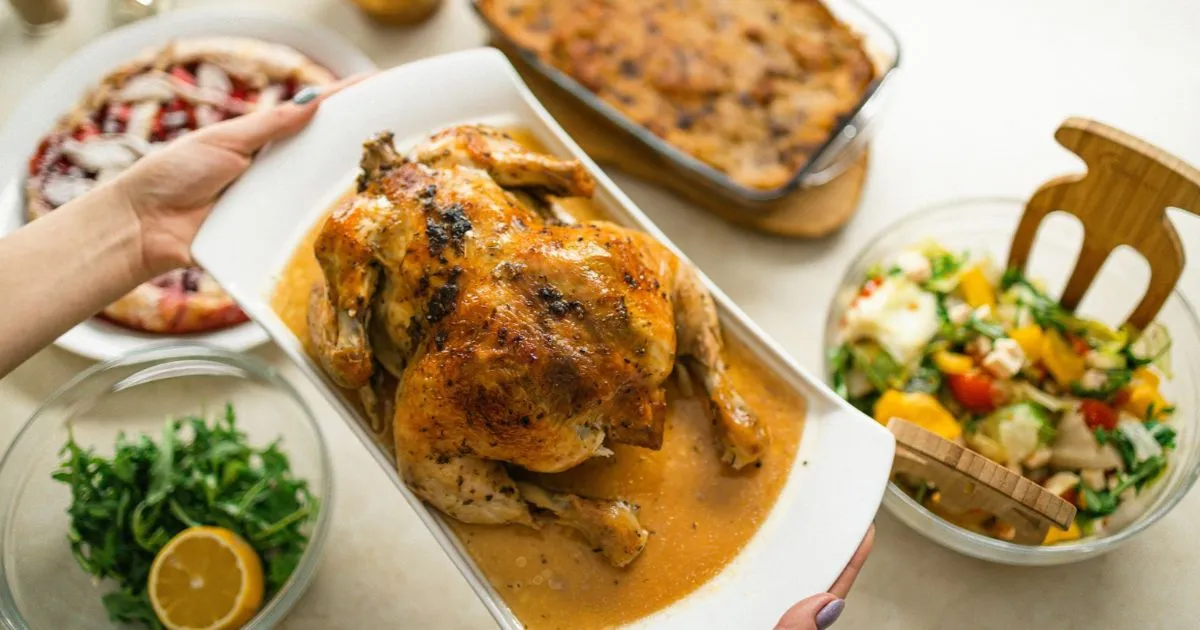
Juicy Oven Roasted Chicken Recipe
A roasted chicken recipe can turn an ordinary evening into a warm family dinner, with crisp skin and tender meat at the center. You do not need special gear or advanced cooking skills to make a whole bird at home.
A thermometer matters more than a fixed cooking time, since birds and ovens vary. This home-cooking guide gives you a clear method, not a guaranteed timing formula. Dry skin helps the outside brown, while careful temperature checks help you avoid overcooking the meat.
Carryover cooking is the brief rise in a roast’s temperature after it leaves the oven as residual heat moves inward. That change is one reason to check the meat, not judge it by color alone. You can plan for a useful weeknight meal, then adjust the schedule to your own oven.
Expect the result to have browned skin and moist meat, with pan juices for serving or gravy. The recipe makes 4 to 6 servings, needs about 20 minutes of hands-on preparation, and uses a hot oven. Start by checking the planned size and timing.

Key Takeaways
- Plan on a 4- to 5-pound whole chicken for 4 to 6 servings.
- Dry the skin before seasoning to help it brown.
- Use an instant-read food thermometer to check doneness.
- Roast at 425°F, then let the chicken rest before carving.
- Refrigerate leftover chicken within 2 hours.
What Does This Recipe Make, and How Long Does It Take?
A 4- to 5-pound whole bird gives you 4 to 6 servings, with an estimated roast time of 75 to 90 minutes. Plan ahead for about 20 minutes of hands-on preparation, plus any time needed to unwrap and dry the chicken.
The roasting window is an estimate, not a promise. Oven accuracy, bird shape, and starting temperature can all change the timing. Use the clock to plan your meal, then use temperature readings to decide when the chicken is done.
A 4- to 5-pound chicken usually roasts for 75 to 90 minutes, but the clock cannot confirm doneness.
| Recipe detail | Planned value | What to expect |
| Yield | 4 to 6 servings | Dinner for a small family |
| Hands-on prep | About 20 minutes | Allow extra time to unwrap and dry |
| Oven setting | 425°F | Hot roasting for browning |
| Estimated roast time | 75 to 90 minutes | For a 4- to 5-pound bird, start checking at 75 minutes |
That window works for meal planning, but it cannot account for every oven or bird. Leave room for a little extra cooking time if the temperature readings are low. Before you begin, gather the ingredients and keep the raw chicken separate from ready-to-eat foods.
The ingredient list is short, and each item has a clear job. Fresh aromatics add fragrance inside the cavity, while butter and seasoning flavor the surface.
Which Ingredients Do You Need?
Set out the ingredients before you handle the whole bird, so the chicken seasoning is ready when you need it. Keep it simple: salt, pepper, butter, and fresh aromatics bring plenty of flavor to a small roast.
For one 4- to 5-pound chicken, gather these six items:
- 1 whole chicken
- 4 tablespoons unsalted butter, softened
- 1½ teaspoons kosher salt and ½ teaspoon black pepper
- 1 lemon, halved
- 1 small yellow onion, quartered
- 3 to 4 sprigs each of fresh thyme and rosemary
How Should You Prepare the Whole Bird?
A wet surface can work against browning, so dry the whole chicken well before you season it. Do not rinse raw poultry, since splashes can spread bacteria to the sink, counter, and nearby utensils.
Remove any giblets, check the cavity, and pat the skin dry with paper towels. The cavity should be empty before you add the aromatics. Throw away the towels and wash your hands after handling the raw bird.

A close-up view of paper towels meticulously laid out on a wooden kitchen countertop, with chicken skin placed on top, glistening slightly, ready to be seasoned. The lighting is soft and warm, showcasing the textures of the chicken skin while casting gentle shadows that enhance the scene. A blurred background features a rustic kitchen setting, including spices in small jars and a cutting board, creating an inviting atmosphere. The angle is slightly above, capturing the paper towels’ absorbency contrasted with the smoothness of the chicken skin, emphasizing the preparation step. The mood is organized and methodical, reflecting a chef’s careful approach to marinating chicken for the perfect oven roast.
Dry the Skin and Check the Cavity
Open the wrapper over a rimmed tray to catch drips. Look inside both ends of the cavity for a packet of giblets, which may be tucked near the neck opening.
Use clean paper towels to blot the skin, including the folds around the legs and wings. Avoid rubbing hard, which can tear delicate skin. Check the cavity again so no packet or loose material remains.
Season the Outside and Cavity
Season the cavity and the outside evenly. Reach the back, sides, and areas beneath the wings, since missed spots can leave bland bites. Keep the seasoning on the skin rather than rubbing it across your counter.
Place the lemon, onion, thyme, and rosemary loosely inside. A tightly packed cavity can slow cooking by blocking hot air from moving through it. The aromatics should sit with room around them, not form a dense plug.
Use this short checklist to keep preparation tidy:
- Remove the packaging and any giblets.
- Pat the skin dry with paper towels.
- Season the inside and outside evenly.
- Add the aromatics loosely inside the cavity.
Discard used towels, then wash your hands and any tools that touched raw chicken. With the surface dry and the cavity prepared, you can mix and apply the butter that adds flavor and supports browning.
How Does This Roasted Chicken Recipe Stay Juicy?
Softened butter should press easily with a spoon, but it should not look melted or oily. That texture helps you spread herb butter in a thin, even layer instead of leaving slick pools on the skin.
Mix 4 tablespoons softened unsalted butter with 1 teaspoon finely chopped thyme, 1 teaspoon finely chopped rosemary, and 1 minced garlic clove. The herbs and garlic add aroma and savory flavor without needing a thick coating.
Spread most of the mixture over the breast and legs. If you can loosen the breast skin without tearing it, rub a little butter underneath. That spot flavors the meat directly, while butter on the outside helps the skin brown.
Garlic butter can burn if it gathers in thick clumps on the surface. Smooth the mixture into a light coat, and move any large lumps across the skin. An even layer melts more consistently than a heavy patch.
Butter adds flavor and helps with browning, but it cannot guarantee juicy meat by itself. The bird’s size, oven, and final temperature all matter. Use careful cooking and a proper rest to protect the texture.
Once the butter is spread evenly, choose a pan and oven setup that lets hot air reach the skin while catching the pan drippings.
What Oven Setup Gives You Golden, Crispy Skin?
Airflow around the chicken helps the skin brown, so set the bird on a rack above the pan. Keep it uncovered during roasting, since trapped steam can soften the skin.
A rack lifts the chicken above the pan juices and exposes more of its surface to heat. Choose a stable pan that can catch the drippings without crowding the bird.
Choose a Pan That Holds the Drippings
A shallow roasting pan with a rack is a useful choice, as its sides hold juices while leaving room for air to move. A rimmed sheet pan with a rack can also work if it is sturdy and deep enough to catch the drippings.
Use a pan that fits the chicken without pressing against its sides. A deep, covered vessel traps steam and works against crispy skin. A rack keeps the bird from sitting directly in its juices as fat and liquid collect below.
Set the Heat for Browning
Preheat the oven fully and set the oven rack in the middle position. These temperature settings show practical tendencies, not guaranteed results; each oven and chicken can brown differently.
| Oven temperature | Browning pace | Skin result | Practical trade-off |
| 350°F | Slower | Gentler browning | Longer cook |
| 400°F | Moderate | Balanced browning | Middle-ground approach |
| 425°F | Faster | Stronger browning | Watch closely near the end |
At 425°F, the surface can brown sooner than the meat finishes cooking. Look at the skin as the roast nears the end, but do not use its color to judge doneness. Your pan and oven setup support browning; temperature checks decide when the chicken is done.
With the oven preheated and the rack in place, use the chicken’s weight to estimate the roasting schedule.
How Long Should You Roast the Chicken?
The chicken’s size gives you a useful estimate, while a thermometer gives you the decision. At 425°F, plan on about 75 to 90 minutes for a 4- to 5-pound bird.
Use these approximate windows to plan, then begin checking at the listed time. Oven accuracy, bird shape, and starting temperature can change the roast time, even when two chickens weigh the same.
| Chicken weight | Approximate time at 425°F | When to start checking |
| 3 to 4 pounds | 60 to 75 minutes | Start checking at 60 minutes |
| 4 to 5 pounds | 75 to 90 minutes | Start checking at 75 minutes |
| 5 to 6 pounds | 90 to 105 minutes | Start checking at 90 minutes |

A beautifully illustrated roast schedule infographic displaying approximate cooking times for oven-roasted chicken based on varying weights, designed for a cooking article. The foreground features an elegant wooden cutting board with a perfectly roasted golden-brown chicken, surrounded by fresh herbs like rosemary and thyme. In the middle, the roast schedule table is artistically presented, featuring columns with chicken weights ranging from 3 to 7 pounds, alongside corresponding cooking times, all in a clear, visually appealing layout. The background showcases a softly blurred kitchen setting, filled with warm, inviting lighting that emphasizes a cozy cooking atmosphere. Use a soft focus lens to create a warm, inviting mood that inspires home cooking, ensuring no text or logos are included in the image.
Carryover cooking is the brief rise in temperature after the chicken leaves the oven, as residual heat moves inward. The temperature can keep climbing for a short time after roasting ends, so avoid cooking far past the safe target.
Use this simple sequence to manage the roast without losing oven heat:
- Place the chicken breast-side up on the rack.
- Roast without repeatedly opening the oven door.
- Begin checking at the time listed for its weight.
- Continue roasting in short intervals if needed.
Frequent door openings release heat and make timing less steady. When you check, close the door promptly if the chicken needs more time. Do not treat the table’s end time as proof that the meat is done.
The weight-based schedule tells you when to start checking, not when to serve. Move from estimated time to the exact places and readings that confirm doneness.
What Internal Temperature Makes It Safe to Eat?
Poultry must reach an internal temperature of 165°F. Check both the thickest part of the breast and the innermost thigh, keeping the probe away from bone.
Use an instant-read food thermometer rather than judging the chicken by skin color or clear juices. The outside can look browned before the center reaches the target, and juices alone do not prove the meat is ready.
Check the Breast and Thigh
Find the thickest part of the breast and the innermost part of the thigh. These areas can cook at different rates, so check both before you take the chicken out.
Keep the thermometer tip in meat, not against bone. Bone can affect a reading and may give you a number that does not reflect the center of the meat.
Use the Thermometer Correctly
Insert the thermometer from the side into the center of the thickest meat. This path helps keep the probe tip in the middle rather than near the surface.
Pause until the reading holds steady, then check another location. If one reading falls below 165°F, return the chicken to the oven and check again after a short interval.
Use this three-point check before removing the roast:
- Breast reading reaches 165°F.
- Innermost thigh reading reaches 165°F.
- Probe stays clear of bone.
A single reading can miss a cooler spot, so check more than one place. Once the readings meet the target, move to the resting step before carving.
How Long Should You Let It Rest?
If the chicken is ready but dinner is not yet on the table, give it 15 to 20 minutes before carving. Use that pause to let the meat settle instead of cutting as soon as it leaves the oven.
Rest the chicken on a cutting board or warm platter for 15 to 20 minutes. As the meat settles, its juices can redistribute, which helps keep slices moist when you serve them.
Carryover cooking can raise the temperature briefly after roasting, as residual heat moves inward. The rest is part of the cooking process, so leave time for it in your dinner plan.
You can place foil loosely over the chicken if you need to hold heat. Do not wrap it tightly, since trapped steam softens the skin you worked to brown.
A warm platter helps keep the meat comfortable while you finish other meal tasks. Once the resting interval ends, move the bird to a stable board and carve it into portions.
How Do You Carve It Cleanly?
Set the rested chicken breast-side up on a stable cutting board before making the first cut. Work with the joints instead of pushing the knife through bone, which can damage the blade and tear the meat.
A sharp carving knife and steady support help you make clean, manageable portions. Use a carving fork to hold the bird, or keep one hand steady and clear of the blade.
Remove the Legs and Wings
Pull one leg away from the body to stretch the skin. Cut through the skin between the leg and breast, then bend the leg back gently to expose the joint.
Follow the joint with the knife rather than forcing the edge through bone. Repeat on the other side. If you want smaller portions, separate each drumstick from its thigh at the joint.
Pull each wing away from the body and cut through its joint. Keep the knife controlled and let the joint guide the cut. Save the board’s juices for serving or gravy.
Slice the Breast
Find the breastbone down the center of the bird. Cut along one side of it, guiding the blade close to the bone as you lift away a breast half.
Repeat on the other side, then place each breast half on the board. Slice across the meat into even pieces, using smooth strokes instead of sawing back and forth.
Arrange the chicken portions on a platter and pour over any board juices you want to serve. Keep the pan drippings nearby as well; they can become a simple sauce for the carved meat.
How Can You Turn Pan Drippings Into Gravy?
Browned bits in the pan can give quick chicken gravy a deeper flavor. Keep the dark bits if they are browned, but avoid blackened pieces that can make the sauce taste bitter.
For a smooth, flour-thickened gravy, use 2 tablespoons fat, 2 tablespoons flour, and 1½ cups chicken broth. Strain the liquid if you want a smoother finish.
Follow these four steps:
- Pour the pan drippings into a heat-safe measuring cup and skim excess fat.
- Measure 2 tablespoons of fat into a saucepan.
- Whisk in 2 tablespoons flour and cook briefly.
- Gradually whisk in 1½ cups chicken broth and the defatted drippings, then simmer until smooth and thickened.
Scrape up browned bits that loosen easily, but leave blackened pieces behind. Strain the liquid before adding it if you prefer a smoother gravy.
Serve the sauce while warm, then turn to side dishes and safe handling for any chicken left on the platter.
What Goes Well With Roast Chicken, and How Do You Store Leftovers?
Pair the chicken with roasted potatoes and a crisp salad for a warm side and a fresh one. A bright side, such as salad with a tart dressing, balances the richness of roast meat.
Green beans make another simple match, especially when you want a vegetable that cooks quickly. Choose sides that fit your meal rather than crowding the table with extra dishes.
Choose Simple Sides
Roasted potatoes can cook alongside the chicken if your pan and oven space allow. Green beans bring a clean, mild taste, while crisp salad adds cool texture and a sharp note.
Chill and Reheat Leftovers Safely
Refrigerate perishable leftovers within 2 hours, and use refrigerated cooked chicken within 3 to 4 days. Store the meat in shallow, covered containers so it cools promptly.
When you reheat leftovers, bring the chicken to 165°F. Refrigeration can soften the skin, and covering it with moisture while reheating will not bring back its crisp texture.
For better texture, keep the meat and any sauce separate until serving. Discard food that has been left out beyond the safe time rather than relying on smell or appearance.
Refrigerate leftover chicken within 2 hours, use it within 3 to 4 days, and reheat it to 165°F.
Before you start cooking, make sure the chicken is fully thawed and your instant-read food thermometer is ready to use.
Conclusion
Use temperature, not appearance, to decide when your chicken is done. A thermometer is more dependable than a time estimate, and dry skin gives the surface a better chance to brown.
Check that the chicken is fully thawed and your thermometer works before you begin. Those two small checks can help you plan the roast and avoid guesswork at dinner.
When you are ready to cook, gather the ingredients and preheat the oven. Then follow the readings rather than rushing the roast by the clock.
FAQ
Should you rinse a whole chicken before roasting?
No, you should not rinse a whole chicken before roasting. Water can splash raw poultry juices onto the sink, counter, nearby dishes, or your hands. Pat the skin dry with paper towels instead, then throw the towels away and wash your hands. This keeps the surface dry for browning and limits the spread of raw juices.
Can you roast a chicken from frozen?
Yes, you can cook a chicken from frozen in an oven, but it takes longer than cooking a thawed bird. Do not stuff it, since the center can heat too slowly. Check the thickest parts of the breast and thigh with an instant-read food thermometer. Both areas must reach 165°F before you serve the chicken.
Should you cover a chicken while it roasts?
No, leave the chicken uncovered while it roasts so the skin can brown. Covering the pan traps steam and can leave the skin soft rather than crisp. If the skin gets too dark before the meat reaches 165°F, place a loose foil tent over the bird. Do not wrap it tightly, since that also traps steam.
Can you put vegetables under the chicken in the roasting pan?
Yes, you can place vegetables under the chicken, as long as they are cut into even pieces. They will soften in the chicken juices and may cook faster than the meat. Check that the vegetables are tender before serving, and avoid crowding the pan so much that air cannot move around the bird.
Do you need to truss a chicken before roasting?
No, trussing is not required for roasting a chicken. Tying the legs is optional and can help the bird keep a compact shape in the pan. If you tie them, do not pull the string so tight that it presses the legs firmly against the body. A loose tie is enough to keep the shape neat.
Can you roast a chicken without a roasting rack?
In this roasted chicken recipe, you can roast a chicken without a rack by setting it on thick-cut onions or carrots. The vegetables lift the bird above the pan and flavor the juices as they soften. Cut them into sturdy pieces and avoid crowding them, since packed vegetables can block airflow. Check that they are fully cooked before serving.