Chicken Brine Recipe: 5 Easy Tips for Juicy, Flavorful Chicken
Table of Contents
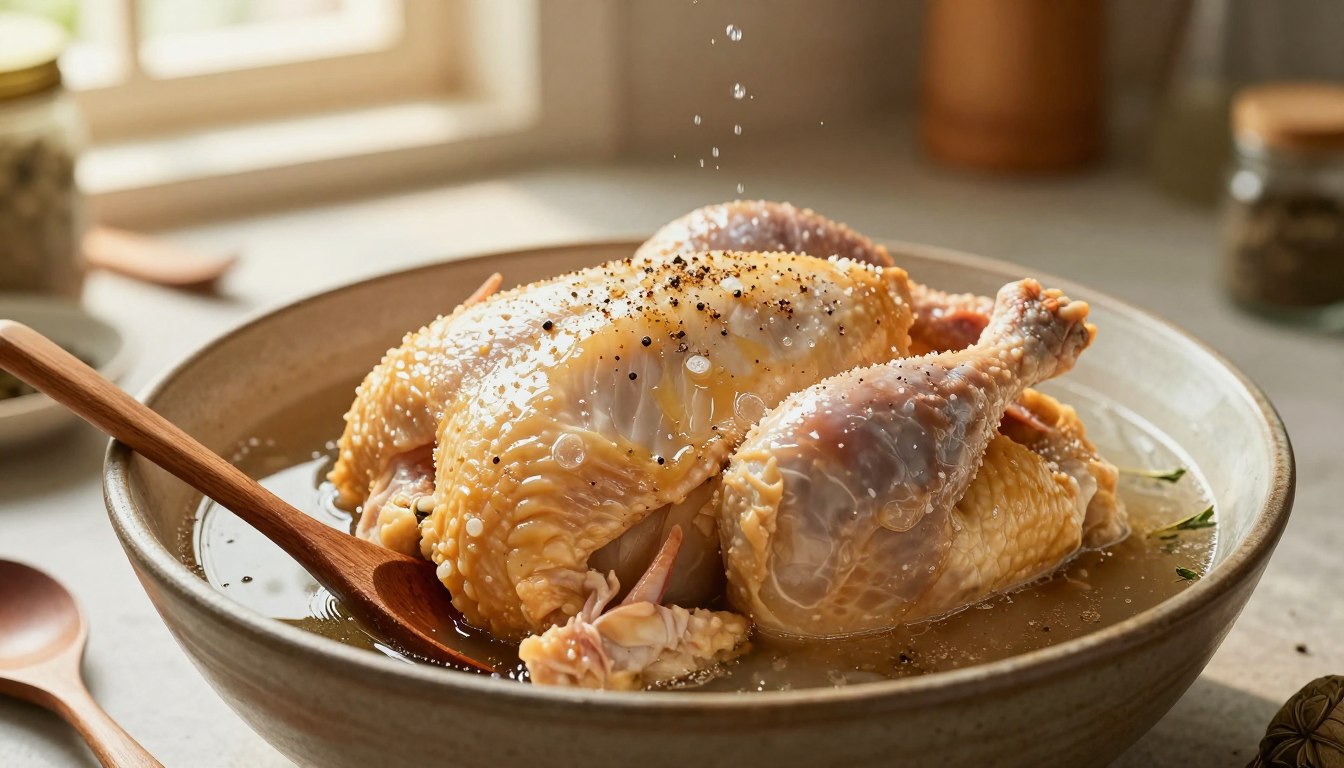
A good Chicken Brine Recipe can help keep chicken juicy, tender, and full of flavor. It involves soaking the chicken in a mixture of salt and water before cooking. This simple step helps the meat absorb seasoning and hold on to moisture. Whether you are cooking chicken breasts, roasting a whole chicken, or grilling chicken pieces, brining can make your meal more flavorful and delicious.
A brine submerges the meat in liquid, while a marinade usually coats its surface. The two methods may share herbs and spices, but they work differently. This recipe gives you a clear starting point, with choices for different cuts and cooking plans. Use the right salt amount and brining time for your chicken.
Wet brine for added moisture and even seasoning, or dry brine when you want a salt-only method without a container of liquid.
What Is the Chicken Brine Recipe for a Short Brine?
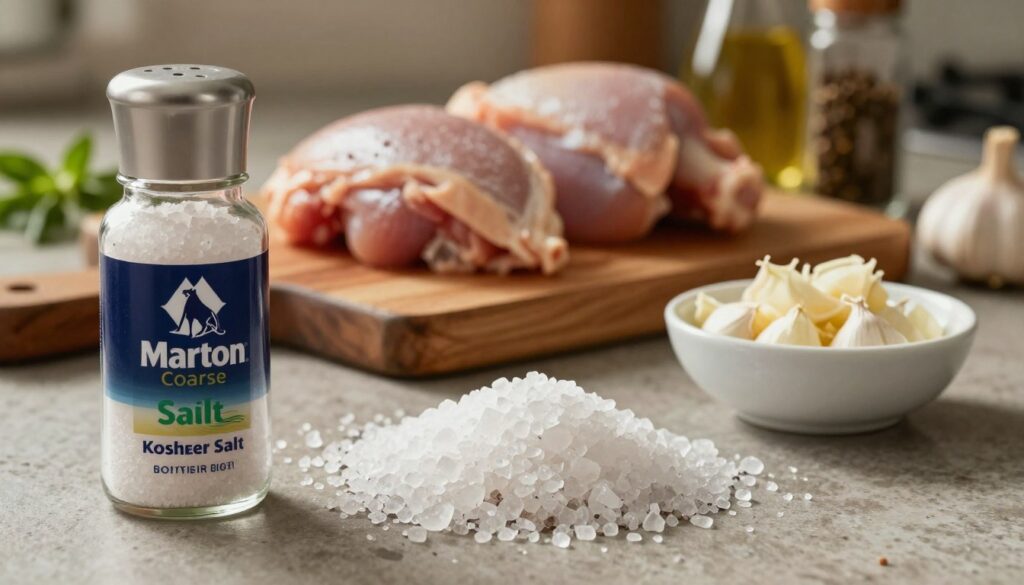
For a short wet brine, combine 1 gallon of water with 1 cup of Morton Coarse Kosher Salt. That base seasons chicken and supports a straightforward brine recipe when you have a few hours. Keep the salt and water in that proportion for a 4-5-hour brine.
A simple brine for chicken breast can use this same short-brine formula. It also works as a best chicken brine recipe when you want dependable seasoning without a long list of ingredients. Water and salt do the main work; sweetener and aromatics are optional.
The Short-Brine Base
Use the table as a practical recipe, then choose only the extra flavors that suit your meal. You do not need every optional ingredient in the same batch.
| Ingredient | Amount | Role |
|---|---|---|
| Water | 1 gallon | Liquid base |
| Morton Coarse Kosher Salt | 1 cup | Essential seasoning |
| Honey or sugar | Optional, to taste | Optional sweetness |
| Garlic, lemon, bay leaves, peppercorns, or fresh herbs | Optional, to taste | Optional aroma and flavor |
This simple chicken brine recipe is easy to scale for a meal, as long as you keep the base proportion intact. Choose a container large enough to hold the chicken under the liquid. The liquid should cover the meat rather than leave a section exposed.
Optional Flavor Add-Ins
Honey can replace sugar, and each sweetener adds a mild note to the brine. Garlic, lemon, bay leaves, peppercorns, and fresh herbs let you steer the flavor toward the rest of dinner. Rosemary and thyme work well with roast chicken, while lemon suits grilled pieces.
Fresh herbs can be used whole, and garlic cloves can be lightly crushed to release more aroma. Keep the add-ins restrained if you plan to use a strongly seasoned sauce later. Keep the salt-and-water base intact, and treat the sweetener and aromatics as optional flavor choices.
How Do You Mix and Cool the Brine?

Dissolve the salt in part of the water before you add chicken or other ingredients that need to stay cold. Cool brine matters because warm liquid can heat the chicken instead of keeping it chilled. The chicken must stay refrigerated throughout brining, at 40°F or below.
A pot makes it easy to dissolve salt and draw flavor from herbs or other aromatics. You can use heat for that step, but do not add chicken until the solution has cooled. Prepare the container and remaining cold water while the pot is on the stove.
Dissolve the Salt and Build the Flavor
Follow these steps to make the solution without letting warm brine reach raw poultry:
- Dissolve the salt in some of the water, stirring until the grains disappear.
- If using aromatics, simmer them with the salt water for 1 minute, then remove the pot from heat.
- Add cold water and let the brine cool to room temperature or colder.
- Place the chicken and brine in a covered container in the refrigerator.
Cool, Submerge, and Refrigerate
Cold water helps lower the brine’s heat after you dissolve the salt or simmer aromatics. The brine must reach room temperature or below before chicken goes in. A covered food-safe container also helps keep the liquid contained and the chicken fully submerged.
Place the container on a refrigerator shelf where it can sit undisturbed. Keep the refrigerator at 40°F or below, and do not leave the chicken out while the brine cools. If the liquid still feels warm, give it more time in the refrigerator before adding poultry.
Add the chicken only after the brine has cooled to room temperature or below.
How Long Should You Brine Chicken?
An overnight chicken brine uses a milder Morton salt ratio than the short-brine recipe. For up to 14 hours, use ½ cup of Morton Coarse Kosher Salt per 1 gallon of water. Do not extend that overnight brine beyond 14 hours.
That lower salt amount suits a longer soak. The right schedule depends on the cut and the recipe you are following, so match both the salt level and the time. An overnight chicken brine gives you a useful option when you want to prepare ahead.
Overnight Brines
Use the overnight ratio only when the chicken will remain in the refrigerator for a longer rest. The meat should sit in the brine, not on the counter, while the salt seasons it. If your cooking plan changes, remove the chicken when it reaches the end of its stated brining window.
A whole chicken takes up more room than pieces, so check that your container can hold the bird under the liquid. The brine needs to surround the meat rather than leave one side exposed. You can use a covered food-safe container that fits the bird and the liquid without crowding them.
Short Brines for Smoked Barbecue
Chicken pieces for smoked barbecue can brine in the refrigerator for 1 to 2 hours. This shorter window suits pieces you plan to cook soon, rather than an overnight schedule. You can use a 1-to-2-hour brining window for those barbecue pieces.
Cut and recipe timing decide which schedule fits your meal. Small pieces and a short barbecue plan call for a shorter rest; an overnight recipe uses its own milder salt level. Do not combine the overnight salt amount with a shorter schedule without following the recipe’s directions.
Keep the overnight brine within the stated limit of up to 14 hours.
Which Salt Works Best for Brining?
Kosher salt is the easiest starting choice, but the right volume changes with the salt’s crystal size. Morton Coarse Kosher Salt is the specified choice for this recipe because its grain size is easier to measure by volume. Do not swap salt types cup for cup without adjusting the amount.
Morton table salt has finer crystals than kosher salt, so the same cup holds a different amount of salt. The volume equivalents below compare Morton table salt with two kosher salts. Use them when a recipe gives a volume rather than a weight.
Kosher Salt and Volume Conversions
| Salt type | Volume equivalent to 1 part Morton table salt | Measurement note |
|---|---|---|
| Morton table salt | 1 part | Fine-grained reference |
| Morton kosher salt | 1 ½ parts | Coarse-grained Morton equivalent |
| Diamond Crystal kosher salt | 2 parts | Different kosher-salt volume equivalent |
For example, the conversion compares one volume of Morton table salt with one and a half volumes of Morton kosher salt. Diamond Crystal kosher salt needs two volumes for that same reference. Those differences reflect grain size, not a change in the desired flavor.
Can Table, Iodized, or Sea Salt Work?
Table salt can work if you use the fine-table-salt conversion rather than the kosher-salt volume unchanged. Iodized table salt also works; treat it like other fine-grained table salt. That keeps your measurement aligned with the amount of salt the recipe calls for.
Sea salt can vary in crystal size, so its volume does not have one reliable swap for every product. Use a trustworthy weight or a product-specific conversion instead of guessing from a cup measure. If you only have a volume recipe, choosing the named kosher salt makes the measurement more direct.
Check the salt type before measuring, especially when a recipe gives a volume rather than a weight.
How Do You Dry Brine Different Cuts?
Dry-brine salt amounts and resting times depend on whether you have breast meat, bone-in pieces or a whole bird. Match the amount to the cut, then refrigerate the chicken for its stated time. Kosher salt is preferred, while regular table salt calls for half the recommended amount.
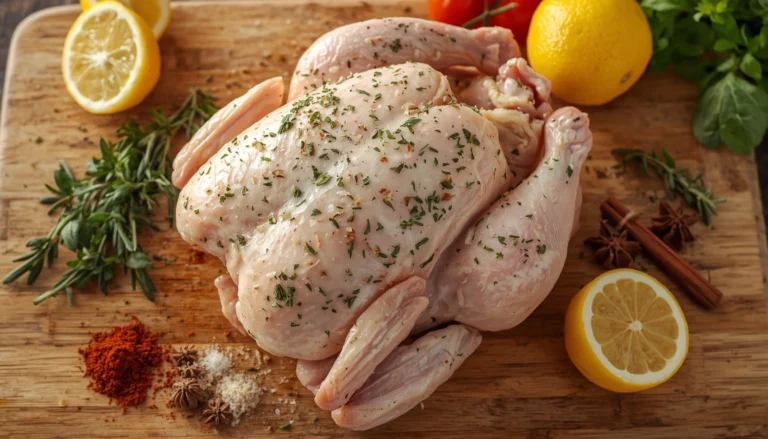
Dry brining means salting the chicken without a liquid bath. It takes less space than wet brining and lets you season each piece directly. Use coarse or kosher salt for the amounts below.
Boneless, Skinless Breasts
For boneless, skinless breasts, use ½ teaspoon of coarse or kosher salt per side. Refrigerate them for 30 minutes to 1 hour. This shorter rest is a practical dry-brine choice when you are preparing breast meat close to cooking time.
Bone-In Cuts
For bone-in, skin-on cuts, use about ¾ teaspoon of coarse or kosher salt per pound. Refrigerate the pieces for 2 to 12 hours. The per-pound amount helps you scale the seasoning when your package contains several pieces.
Whole Chicken
For a whole chicken, use about 1 teaspoon of coarse or kosher salt per pound. Refrigerate the bird for 8 to 24 hours. Spread the salt across the bird so the outside gets even coverage.
Use a kitchen scale to check the bird’s weight before you work out its salt amount. For regular table salt, use half the stated amount because its fine grains pack more tightly by volume. Keep the salt type and measurement in mind when following a dry-brine recipe.
| Cut | Salt amount | Refrigerator time |
|---|---|---|
| Boneless, skinless breasts | ½ teaspoon per side | 30 minutes to 1 hour |
| Bone-in, skin-on cuts | About ¾ teaspoon per pound | 2 to 12 hours |
| Whole chicken | About 1 teaspoon per pound | 8 to 24 hours |
Set a refrigerator timer for the interval that matches the cut and salt amount you used.
Should You Rinse or Pat Dry Brined Chicken?
Skip rinsing dry-brined chicken, and focus on removing surface moisture before cooking. A dry surface helps brined chicken sear or grill rather than steam. After wet brining, remove the chicken and pat it thoroughly dry with paper towels.
Rinsing and patting dry are not the same step. Rinsing adds water to the surface, while paper towels lift away moisture without wetting the meat again. Dry-brined chicken does not need to be rinsed before cooking.
After you remove chicken from a wet brine, let excess liquid drain into the container. Set the pieces on a clean tray, then press paper towels against every side. Pay attention to folds and the area around joints, where liquid can collect.
Drying the surface matters when you want browned skin or a good sear in a pan. Wet skin can delay browning and may steam against the cooking surface. For grilling, a dry exterior also helps the chicken make better contact with the grate.
Use fresh paper towels if the first ones become soaked. Do not scrub the chicken; a firm, gentle press is enough to remove surface water. This step does not remove seasoning that has moved into the meat.
Pat the chicken thoroughly dry so the surface can brown instead of steaming.
How Do You Brine Chicken for Grilling and Smoking?
For smoked barbecue chicken, keep the grill between 400° and 450°F. That heat range suits this barbecue method and still lets you manage direct and indirect cooking. Add barbecue sauce near the end, so its sugars have less time to burn.
A chicken brine recipe for BBQ works before grilling or smoking, whether you choose a wet brine or a dry brine. Fresh herbs, garlic, and other aromatics can fit the meal, while the brining time should match the recipe and cut. The cooking setup matters just as much as the seasoning.
Grilling Brined Chicken
Use direct heat to sear the chicken and build color on its surface. Move whole or bone-in pieces to indirect heat to finish cooking without leaving them over the hottest part of the grill. This two-zone setup gives you control over browning and cooking.
Here is a simple sequence for grilled chicken:
- Preheat the grill and set up direct and indirect heat where needed.
- Sear the chicken over direct heat, or position it for the cooking method you chose.
- Monitor doneness with a food thermometer, especially in thick pieces.
- Add barbecue sauce near the end of cooking.
Smoking Barbecue Chicken
A simple chicken brine recipe for smoking can use the same basic approach as other chicken brines. Keep the grill between 400° and 450°F for smoked barbecue chicken. If you are grilling smaller pieces, place them where heat can brown the outside without burning the surface.
Watch the chicken as it cooks, since size and grill setup affect how quickly it finishes. Direct heat works for searing, while indirect heat helps whole or bone-in cuts cook through more gently. Move pieces as needed to keep them from sitting over a hot spot.
Sauce can burn if its sugars stay over the heat for the full cook. Add it about 5 to 8 minutes before the chicken is done, or when it reaches about 140-145°F. That late step reduces the risk of scorched sauce.
Add sugary barbecue sauce near the end of cooking rather than leaving it over the heat for the full cook.
What Temperature Should Brined Chicken Reach?
The doneness check that matters is 165°F in the center of the meat, with the thermometer away from bone. Use a food thermometer to check the thickest portion of each cut. Chicken is food-safe at an internal temperature of 165°F.
Insert the thermometer into the center of the meat without touching bone. Bone can affect the reading, so shift the tip if it rests against one. Check the thickest part rather than judging doneness by the outside color alone.
For a whole chicken roasted at 350°F, about 20 minutes per pound is a general time estimate. The bird’s size and your oven’s performance affect how long roasting takes. A smaller bird may finish sooner than a larger one.
Use the roasting estimate to plan dinner, not as proof that the meat is done. Begin checking with a thermometer as the bird nears its expected finish time. If the reading has not reached the safe mark, continue cooking and check again.
Different pieces can finish at different times, even when they share one pan. Check each thick section, including the breast and thigh, and keep the thermometer tip away from bone. This gives you a direct check on the meat rather than relying on a timer.
Let the thermometer reading, not the clock alone, decide when the chicken is done.
Which Chicken Should You Not Brine, and What Can Go Wrong?
Check the poultry label before brining, because some birds are already salted or seasoned. Pre-treated poultry may contain added salt or flavoring, so another brine can make it too salty. Avoid brining poultry that is basted, enhanced, marinated, or already classified as kosher.
Read the package before you choose a brining method. Check the container, too, because salty brine can react with metals such as aluminum. Use a food-safe vessel made from a nonreactive material, with enough room to submerge the whole bird.
These three mistakes can lead to oversalted chicken, uneven brining, or a damaged container:
- Brining poultry that is basted, enhanced, marinated, or already classified as kosher.
- Leaving a larger item, such as turkey, partly above the liquid during an overnight brine.
- Using a reactive metal container, such as aluminum, for salty brine.
Pre-treated poultry may already carry salt or seasoning from processing. Adding more can push the flavor past what you want, especially when the meat will also get a salty rub or sauce. Choose untreated chicken when you plan to brine it.
Larger birds need enough liquid to stay fully under the brine during an overnight rest. A container that is too shallow can leave part of the bird unseasoned. Choose a size that fits both the poultry and enough liquid for full coverage.
Use a food-safe, nonreactive container that keeps the whole bird under the brine.
Conclusion
Good brined chicken starts with a salt amount and resting time that match the cut. Wet brining adds moisture through a salt-water soak, while dry brining seasons the surface without a liquid container. Either method can help you build flavor when you measure salt carefully.
Keep the salt amount matched to its crystal size, especially when a recipe measures by volume. That small check helps you avoid a too-salty batch and makes your results easier to repeat. Before you begin, write down the cut, salt type, and start time.
Before your next cook, note the cut, salt type and brining start time so you can repeat the result.
FAQ
How to properly brine chicken breasts?
What kind of salt is best for brining?
Do you rinse chicken after soaking in brine?
Does a 30 minute brine work?
Do I refrigerate chicken while brining?
Is table salt ok for brining?
Is iodized salt ok for brining chicken?
Do I wipe off salt after dry brining?
What Did You Think? Rate This Recipe
Absolutely Tender and Packed with Flavor!
I followed this guide step by step and the beef shank came out amazingly tender and full of flavor. The tips on maintaining moisture made all the difference. Highly recommended for anyone trying this cut for the first time!