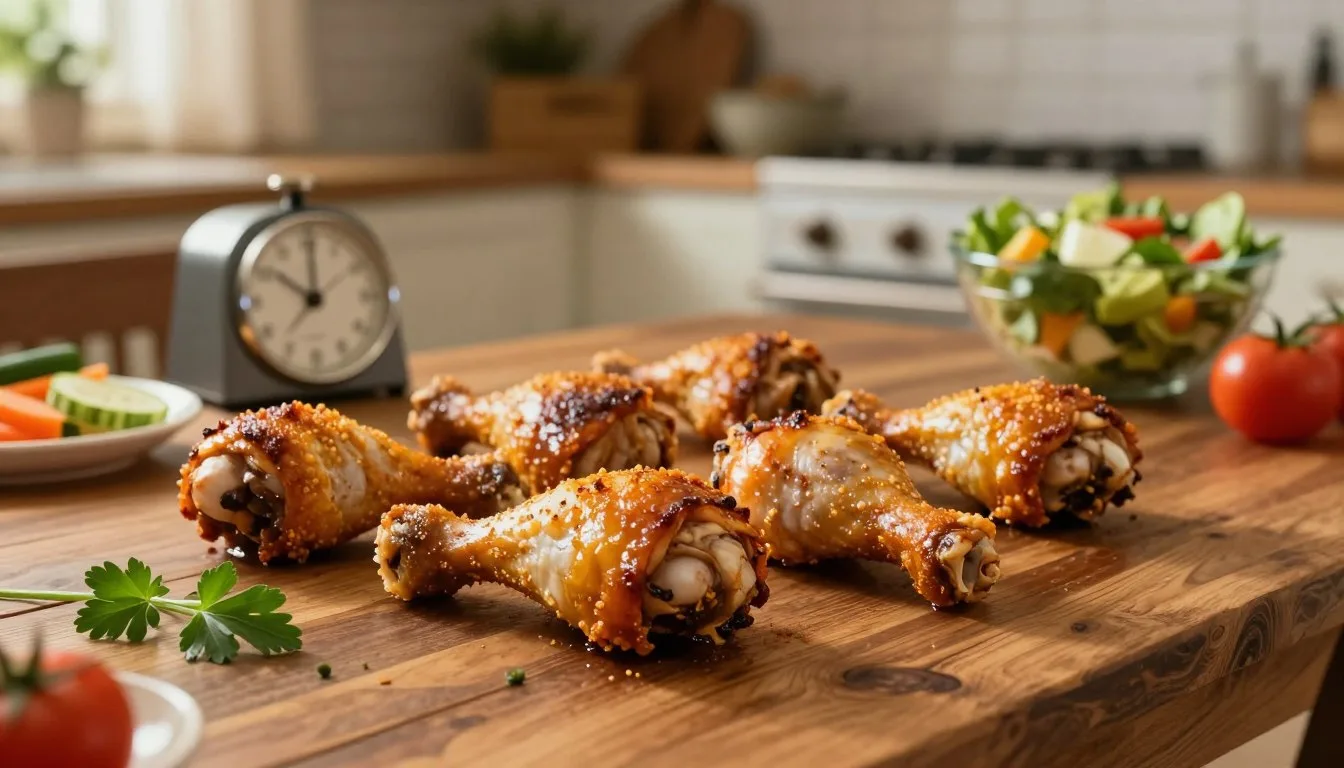
Baked Chicken Legs: Easy 45-Minute Recipe for Crispy Skin
Table of Contents
You can make crisp-skinned baked chicken legs in about 45 minutes with bone-in drumsticks, oil, and pantry spices. The recipe fits a weeknight meal, when you want a warm dinner without a long list of steps.
A drumstick is the lower portion of a chicken leg, below the thigh. You can season these pieces with familiar spices and let the oven do most of the work. An instant-read thermometer, rather than appearance alone, confirms that the chicken is done.
That makes this an easy recipe to keep in reach for busy nights. The method is flexible enough for a simple family dinner or a meal with extra sides.
Are Chicken Legs and Drumsticks the Same Cut?
A drumstick is the lower portion of the leg, while a whole chicken leg includes both the thigh and drumstick. Those names describe different cuts, so check the package before choosing a recipe or planning portions.
This recipe uses drumsticks, not whole leg quarters. The cut you buy affects both the amount of meat on each piece and the time it needs in the oven.
Drumsticks Are the Lower Leg
A drumstick is the lower part of a chicken leg, below the joint and thigh. Its rounded, meaty end tapers toward the ankle. Chicken drumsticks are sold on their own, often bone-in with the skin attached.
The word “leg” can mean more than one cut in a store or recipe. In this recipe, legs means individual drumsticks, not a whole leg or a package of leg quarters. Leg quarters include the thigh and drumstick together, so they are larger pieces.
For a main protein, plan on 2 drumsticks per person. A child may eat one, especially when you serve filling sides. If you are feeding a mix of ages, buying a few extra pieces gives you room for larger appetites.
Whole Legs Include the Thigh
A whole chicken leg combines the thigh and drumstick. You may see this cut sold with the skin and bone, while leg quarters also include part of the back. A USDA chicken-parts diagram shows where the leg, thigh, and drumstick meet.
Bone-in, skin-on thighs are a closer substitute for drumsticks than chicken breasts. Thighs have dark meat and a similar structure, though their shape and thickness differ. Chicken breasts are leaner and can dry out if you treat them like legs.
Package labels can help, but the shape of the pieces matters too. A long package label may say “chicken legs” even when it includes several cut types. Look at the pieces themselves and match them to the recipe’s instructions.
If you buy whole legs, separate the thigh and drumstick before following a recipe written for drumsticks.
Ingredients for a Simple Brown Sugar Seasoning
You need 2 pounds of drumsticks and a short list of everyday seasonings to make this batch. The blend balances sweet, savory, and smoky notes without a bottled sauce or a long marinade.
Baked chicken legs with brown sugar use 1½ tablespoons of brown sugar for 2 pounds of chicken, and the sugar caramelizes as the chicken bakes. The small amount adds a mild sweet edge rather than making the meat taste like dessert.
The Pantry Seasoning Blend
Gather the ingredients before you start, then mix the dry spices in a small bowl. Olive oil helps the seasoning cling to the chicken. Sea salt and black pepper round out the blend.
- 2 pounds chicken drumsticks, about 9-10 pieces
- 2 tablespoons olive oil
- 1½ tablespoons brown sugar
- 1 teaspoon sea salt
- ½ teaspoon black pepper
- 1 teaspoon garlic powder
- 1½ teaspoons smoked paprika
- ¼ teaspoon chili powder
- 1 teaspoon onion powder
Easy Flavor Swaps
Regular paprika can replace smoked paprika if that is what you have. It gives the chicken color and a mild pepper flavor, though it lacks the smoky note. The recipe still works with this simple swap.
You can change the heat by adjusting the chili powder, or leave it out for a milder seasoning. Garlic powder and onion powder add savory flavor without the moisture of fresh garlic or onion. That helps the spice mix spread evenly over the pieces.
A premade seasoning blend can replace some of the listed spices, but blends differ in salt content. Taste the blend on a small pinch, or read its label before adding more salt. Salt levels can shift quickly when a mix already includes it.
Keep the salt separate until you check whether a substitute seasoning blend already contains it.
How to Make Baked Chicken Legs in 45 Minutes
Set aside about 10 minutes to prepare the pan and season the drumsticks before they go into a 425°F oven. The short prep keeps dinner moving, and the chicken needs no marinade for this simple baked chicken recipe.
Bake uncovered for 35 minutes, then check that the thickest part next to the bone reaches 165°F. About 10 minutes of preparation plus 35 minutes of baking fits the 45-minute recipe promise.
Season the Chicken and Prepare the Pan
Use these steps to get the chicken ready without extra dishes or a long wait:
- Preheat the oven to 425°F. Line a rimmed baking sheet with foil for easier cleanup.
- Pat the drumsticks dry with paper towels so excess moisture does not remain on the skin.
- Coat the pieces with oil, then add the seasoning. Turn them until the spice mix covers each side.
- Arrange the chicken on the baking sheet with space between pieces. Do not stack or crowd them.
- Bake uncovered, then check the largest piece with an instant-read thermometer.
Keep the pan on a steady oven rack, where the pieces can bake without being moved around. Foil makes cleanup easier, but it does not replace the open space around each drumstick. If the pieces touch, the areas between them may not brown as well.
The seasoning should cling to the oiled surface. If a little spice mix falls onto the foil, leave it there rather than pressing it into the chicken after baking. Loose sugar and spices can darken on the hot pan.
Bake and Check the Thickest Piece
Place the baking sheet in the heated oven and leave the chicken uncovered for the stated bake. The skin can brown as the meat cooks, and the pan needs no lid. An instant-read thermometer gives you a more useful check than color alone.
Push the thermometer into the thickest part beside the bone, without touching the bone itself. The reading should reach 165°F for safe doneness. If the thickest piece has not reached that point, return the pan to the oven and check again soon.
Pieces can vary slightly, even in one package. Check another drumstick if it looks much larger than the rest. The goal is a safe reading in the meat, not a particular shade of brown on the skin.
Let the cooked chicken rest briefly before serving so the hot juices settle.
Crispy Skin Tips That Keep the Meat Juicy
A rack and enough room between pieces help hot air reach more of the skin. Airflow matters because chicken packed close together can trap steam between the pieces.
Leave 1-2 inches between drumsticks when crisp skin is your goal. A wire rack also lifts the chicken above the pan, letting heat move around more of each piece.
These options change the surface of the chicken without changing the basic seasoning. Choose one approach at a time so you can see what works with your pan and oven.
| Technique | How to use it | Crisping benefit | Important limit |
|---|---|---|---|
| Wire rack | Set the rack over a baking sheet | Airflow reaches more sides | Avoid crowding |
| 1-2 inches between pieces | Leave open space around each drumstick | Air moves around the chicken | Use a larger pan if needed |
| Baking powder | Use 3 teaspoons in a separate seasoning method | Helps the skin crisp | Use baking powder, not baking soda |
| Staged heat | Bake 30 minutes at 390°F, then 15 minutes at 430°F | Creates a browned, crisp finish | Watch closely near the end |
The brown sugar in this recipe caramelizes as the chicken bakes and supports crisping. It also means the skin can darken faster than a seasoning mix without sugar. Keep an eye on its color as the chicken nears the end of baking.
Baking powder belongs to a separate method, not an automatic addition to this seasoning. It can help dry the skin, but baking soda is not an equal swap. Using the wrong powder can affect both flavor and texture.
A wire rack can also help the pieces cook more evenly by letting hot air reach the underside. If you do not have one, space the chicken directly on the pan instead. Avoid lining the pieces up so tightly that their edges touch.
If you use the staged-heat method, judge the finish by the skin and doneness rather than adding time automatically.
Bake Drumsticks, Whole Legs, and Quarters at Different Times
Larger cuts need their own timing, so use the piece and oven temperature as a pair. A drumstick timing does not fit every cut, because whole legs and leg quarters contain more meat.
At 400°F, leg quarters typically bake for about 40-50 minutes. Piece size and oven performance affect the timing, so use a thermometer rather than relying on the clock alone.
Use the cut and temperature together when adapting a recipe:
| Cut | Oven temperature | Typical bake time | Doneness check |
|---|---|---|---|
| Bone-in, skin-on whole legs | 410°F | 45-50 minutes | Check the thickest part |
| 4 leg quarters | 425°F | 35-45 minutes | Check the thickest part |
| Leg quarters | 400°F | About 40-50 minutes | Use a thermometer; size and oven performance affect timing |
A baked chicken leg quarters recipe must match the cut and temperature rather than borrow the drumstick timing. A leg quarter is larger than a single drumstick, and its thicker sections need a direct doneness check.
Bone-in, skin-on whole legs bake at 410°F for 45-50 minutes as a typical range. The thigh and drumstick remain joined, so check the thickest section rather than assuming both parts finish together. A very large piece may need longer than a smaller one.
A recipe using four leg quarters bakes at 425°F for 35-45 minutes. The size of each quarter and your oven can shift the result within that range. At 400°F, about 40-50 minutes is a general rule for quarters, not a promise for every pan.
For any cut, take the temperature in the thickest part of the meat. Avoid using the drumstick timing for chicken thighs or quarters just because they share a package labeled “legs.” That label can cover pieces with different sizes and shapes.
Use the thermometer reading as your final check whenever the pieces vary in size.
Check Doneness With a Thermometer
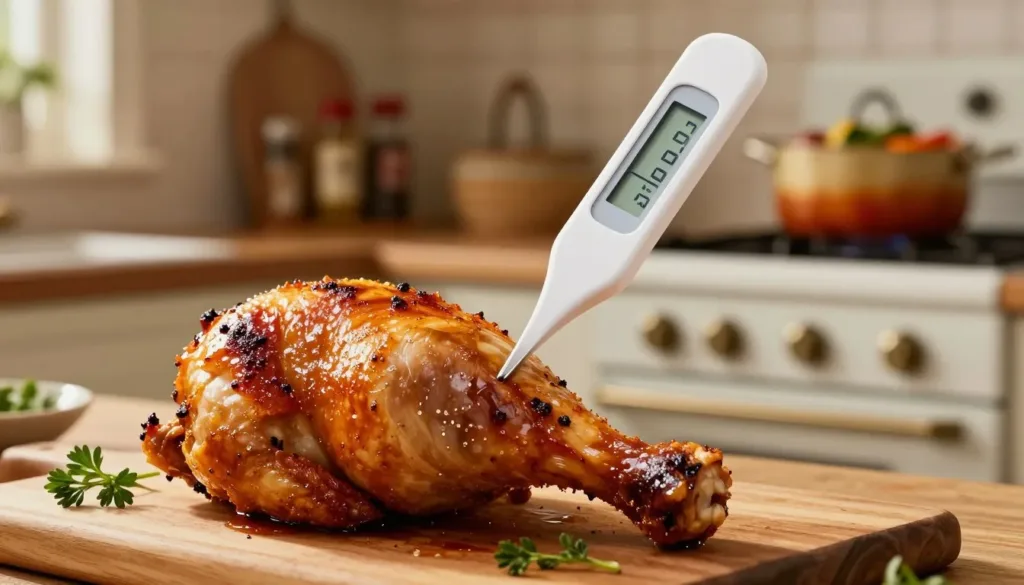
An instant-read thermometer gives you a more dependable doneness check than color alone. Use the reading, not a guess, because a drumstick can look ready before the meat near the bone is done.
Chicken drumsticks often have a more tender dark-meat texture at 175-180°F. That is a texture preference beyond the minimum safe threshold, not a replacement for checking the meat.
Place the Probe in the Meatiest Part
Choose the largest drumstick first. Insert the instant-read thermometer into its thickest, meatiest section, keeping the tip away from the bone. Bone can give a misleading reading, so the probe belongs in the meat.
Check another piece when the drumsticks differ in size. One smaller piece may finish before a large one, and its reading cannot stand in for the larger piece. Place the probe in each piece you need to assess.
Cutting into the chicken is less reliable than using a thermometer. The color of cooked meat can vary, and clear juices do not prove that the center has reached a safe temperature. A thermometer gives you a direct reading where it matters.
Cook Dark Meat for Tender Texture
Dark meat can tolerate more cooking than lean chicken breasts while developing a softer texture. Many cooks prefer drumsticks around 175-180°F for tenderness. Keep the difference clear: a safe threshold and a texture target answer separate questions.
After taking a reading, remove the probe and clean it before checking another piece. This keeps raw juices from spreading onto cooked chicken or serving dishes. Handle the thermometer carefully while the pan and oven are hot.
Do not judge doneness by the skin alone. A browned outside says little about the center of a thick piece. Check the meat itself, especially when the drumsticks are not all the same size.
Take the reading in the meat, not against the bone, for the most useful result.
Sauces, Potatoes, and Other Ways to Serve the Chicken
Two drumsticks per person is a useful starting point when the chicken is the main protein. Filling sides make the meal go further, while a sauce adds another flavor without changing the seasoning.
Baked chicken legs with sauce work well with barbecue, honey mustard, or ranch, while sugary barbecue or teriyaki sauce should go on in the final 10-15 minutes. Adding a sweet glaze too early can make it scorch.
Sauces and Glazes
Serve a dipping sauce at the table if you want each person to choose how much to use. Ranch and honey mustard are easy options for kids and adults. Barbecue sauce brings a sweeter, tangy flavor that suits the browned skin.
For a glaze, brush on barbecue or teriyaki sauce during the final 10-15 minutes of baking. The short finish warms the sauce without leaving it exposed to heat for the whole cook. Keep extra sauce separate for dipping.
A thin layer is easier to manage than a heavy coating. Too much sauce can cover the texture of the skin, and sugary sauces can darken quickly. Add only what you plan to serve with the chicken.
Potatoes, Vegetables, and Seasoning Variations
Baked chicken legs with potatoes pair well with mashed or roasted potatoes, which you can cook separately to avoid crowding the chicken. Separate pans also let the potatoes brown without taking up space around the drumsticks.
Italian baked chicken legs can use Italian seasoning or a mix of familiar dried herbs. Choose a blend that fits the meal, then keep the rest of the plate simple. Olive oil and pepper can help bring those herb flavors together.
Pick sides based on the time you have and what is already in your kitchen:
- Mashed or roasted potatoes for a filling plate
- Rice to catch sauce and pan juices
- Roasted vegetables for a warm side
- A green salad when you want something crisp
- Baked beans for a sweet, hearty pairing
- Barbecue, honey mustard, or ranch for dipping
A green salad can balance the rich skin, while rice offers a mild base for a saucy piece. Roasted vegetables and baked beans make the meal more filling. You do not need every side at once; one or two are enough for a weeknight plate.
Keep a sugary glaze off the chicken until the final part of baking so it does not scorch.
Store and Reheat Leftover Chicken Safely
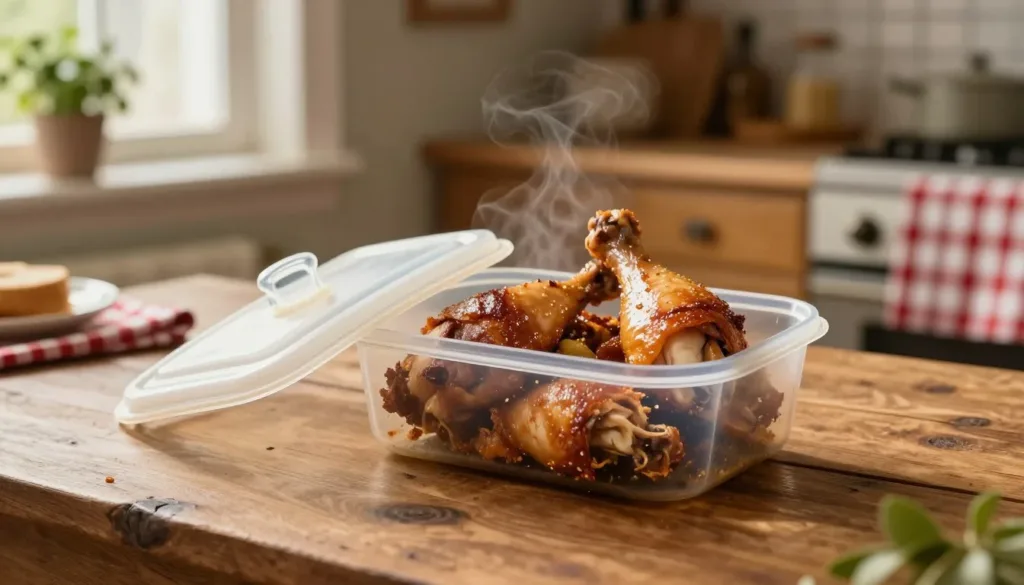
Refrigerate cooked chicken promptly and keep the refrigerator at 40°F or colder. Cooked and raw chicken have different storage windows, so do not use the raw-chicken limit for leftovers.
Use refrigerated cooked chicken within 3 to 4 days. Store it in a covered container, and freeze portions you will not eat within that period.
Refrigerate or Freeze the Chicken
Cooked chicken should go into the refrigerator soon after the meal. A covered container helps protect it from spills and keeps the pieces together. Keep the refrigerator at 40°F or below while you store it.
Raw chicken has a shorter refrigerator window than cooked leftovers. Keep raw chicken at or below 40°F, and cook or freeze it within 1 to 2 days. Raw pieces can stay frozen for up to nine months, while a whole chicken can stay frozen for up to one year.
Labeling a container with the day you stored it can help you track leftovers. Put older food where you can see it before adding a new batch. If cooked chicken has passed its storage window, do not keep it for another meal.
Freeze raw chicken in a sealed package or freezer-safe container to limit exposure to air. Split a large package into meal-size portions if that makes it easier to thaw only what you need. Keep raw pieces and cooked leftovers in separate containers.
Reheat for a Crispier Finish
An air fryer can revive the skin on leftover drumsticks. Reheat them at 350°F for 5 minutes, then check that the center is hot. Avoid packing the basket tightly, since crowded pieces will not heat as evenly.
The microwave is convenient when speed matters, but it leaves the skin softer. Use a microwave-safe plate and cover the chicken loosely to reduce splatter. The texture will differ from an air-fried piece.
Choose a method based on whether you value speed or crisp skin more. An air fryer gives the skin a better chance to crisp again, while the microwave heats the chicken with less setup. Either method works for properly stored leftovers.
Discard refrigerated cooked chicken after its 3-to-4-day storage window.
Conclusion
A hot oven, a simple seasoning, and a careful temperature check are all you need for a reliable dinner. Dry skin and open space help the pieces brown, while the thermometer confirms the center is done.
Choose a side that suits your evening, from rice to roasted vegetables. Keep the method simple when time is short, or add a sauce for a different flavor. Gather your drumsticks and seasonings, then make the recipe for your next weeknight meal.
FAQ
What sauces pair well with chicken?
Why are drumsticks so high in calories?
Is it better to bake chicken at 350 or 400 in the oven?
What is the best way to bake chicken and keep it moist?
Is it better to eat leftover chicken cold or reheat it?
Is it safe to eat 5-day-old cooked chicken?
Ready to master more kitchen favorites? Explore all our tested chicken and beef recipes step by step: Read More
What Did You Think? Rate This Recipe
Absolutely Tender and Packed with Flavor!
I followed this guide step by step and the beef shank came out amazingly tender and full of flavor. The tips on maintaining moisture made all the difference. Highly recommended for anyone trying this cut for the first time!