Baked Boneless Skinless Chicken Breast: 400°F for Perfect Results
Table of Contents
Baked boneless skinless chicken breast cooks best at 400°F, and a thermometer is the surest way to confirm it is safely cooked through. Size and thickness shape the cooking time, so a clock alone cannot tell you when dinner is ready. Internal temperature is the temperature measured inside the thickest part of the chicken.
A dependable chicken dinner should feel simple, not like a guess. An instant-read thermometer gives you a more reliable check than color alone, which can vary as chicken cooks. You can use this recipe for an ordinary weeknight or a meal you plan to serve to guests. The steps work with a few pantry seasonings and a regular oven, so you do not need a special sauce or a long marinade. Watch the thickest part of each piece, especially when the breasts are different sizes. Then give the cooked meat a little time to settle before cutting. That small pause helps keep the juices in the chicken rather than on the cutting board. Plan to rest the chicken briefly before slicing so its juices stay in the meat.
Baked Boneless Skinless Chicken Breast at 400°F
For four servings, arrange four boneless, skinless chicken breasts in one layer and season them before baking. This simple recipe uses about 2 pounds of chicken and a 9-by-13-inch baking dish. The dish gives each piece room to cook without stacking.
Use an instant-read thermometer to check doneness, since minutes alone cannot confirm that every piece is cooked through. The short method below makes baked chicken with a lightly seasoned surface and a tender center. Leave space between pieces rather than crowding the pan.
Ingredients for Four Servings
- Four boneless, skinless chicken breasts, about 2 pounds total
- 1 tablespoon olive oil
- 1½ teaspoons salt
- 1 teaspoon garlic powder
- 1 teaspoon paprika
- 1 teaspoon black pepper
The Simple Baking Method
- Preheat oven to 400°F. Set a rack in the center of the oven.
- Place chicken breasts in a 9-by-13-inch baking dish in one layer.
- Brush the chicken with olive oil, then season all sides evenly.
- Bake until the thickest part reaches 165°F (74°C). The time varies with size and thickness.
- Take the dish from the oven and let the chicken rest briefly before slicing.
For baked chicken breast recipes, this basic approach is easy to adjust with different seasonings. The same method suits fresh or fully thawed chicken breasts. Keep the pieces in one layer so hot air can move around them, and avoid letting their edges overlap. A crowded dish can slow cooking and make the pieces finish at different times. Leave space between pieces rather than crowding the pan.
Choose the Oil and Seasonings
Olive oil and a few pantry spices give the chicken a lightly seasoned exterior without needing a bottled sauce. The base mix balances salt, garlic powder, paprika, and black pepper for a mild, savory flavor. Measure the salt before mixing, especially if you plan to add another seasoning blend.
Use 1 tablespoon olive oil to coat four breasts. The oil helps the seasoning stick to the surface and supports browning as the chicken bakes. It also keeps dry spices from falling off as you handle the pieces. You need only a thin coat, not a pool of oil in the dish.
The recipe uses 1½ teaspoons salt, plus 1 teaspoon each of garlic powder, paprika, and black pepper. Garlic powder spreads garlic flavor evenly without adding moisture or pieces of fresh garlic. Paprika adds mild warmth and color, while pepper gives the seasoning a gentle bite. Together, the spices add flavor without covering the taste of the chicken.
You can stir the salt and spices together in a small bowl before adding them. That helps distribute the salt evenly across the breasts instead of leaving one patch too salty. A salt-free seasoning blend can add herbs or other spices without changing the salt amount. If your blend contains salt, use it in place of some or all of the recipe’s salt, rather than adding it on top.
Premixed blends can vary in how much salt they contain, so check the label before seasoning. A small change in salt can make a big difference across four pieces. Measure salt carefully if you add a premixed seasoning blend.
Prepare Chicken Breasts for Even Baking
If one end of a breast is much thicker than the other, even it out before seasoning. More even pieces cook at a similar pace, so the thin end is less likely to dry out before the thick end finishes. A practical target is ½- to ¾-inch thickness.
Pounding helps the chicken cook more evenly, but you only need to flatten the thick area. Place each breast between two sheets of plastic wrap or inside a sturdy food-safe bag. Use a meat mallet or rolling pin to tap the thick end outward. Work gently, and check the shape as you go.
Pound Thick Areas to an Even Thickness
Keep the thinner end in place while you tap the thicker section. Start with light pressure, then use a few more taps where the meat still bulges. This approach spreads the thick area without crushing the whole piece. Pounding to an even thickness can help chicken breasts cook at a more similar rate.
A meat mallet with a flat side works well for this task. A rolling pin can also do the job if you do not have a mallet. Protect the counter from raw chicken, and wash your hands and tools after they touch it.
Make Chicken Breast Halves
Breasts weighing 10 ounces or more can be sliced in half horizontally before pounding. Hold the chicken flat on a clean board, then cut parallel to the board with a sharp knife. The result is two thinner breast halves that are easier to even out.
Use this quick check before you season:
- Check the size of each breast and compare the thick ends.
- Pound the thick area outward until it matches the thinner area.
- Slice breasts weighing 10 ounces or more into halves when useful.
These steps help when a package contains pieces with very different shapes. They also make it easier to arrange the breasts in a single layer later. Stop pounding once the piece is even rather than flattening it paper-thin.
How Long to Bake Chicken Breast at 400°F
A thawed 6-8-ounce breast usually needs about 20-25 minutes in a 400°F oven. Use the time as a guide, not proof that the center is done. Thickness can change the bake time even when two breasts weigh the same.
Oven heat, breast shape, and how closely the pieces sit can also affect when you should check them. The ranges below cover fully thawed, boneless, skinless chicken breasts. Start checking near the early end when pieces are thin, and allow more time for large or thick pieces.
Timing at 350°F, 375°F, 400°F, and 425°F
| Oven temperature | Chicken size | Approximate bake time |
|---|---|---|
| 350°F | 6-8 ounces | 25-35 minutes |
| 375°F | 6-8 ounces | 22-30 minutes |
| 400°F | 6-8 ounces | 20-25 minutes |
| 400°F | 9-12 ounces | 25-35 minutes |
| 425°F | 6-8 ounces | 18-23 minutes |
These ranges are useful when you need to plan dinner, but they are not an exact promise for every oven. A thick breast may need longer than a thin one of the same weight. Pieces that vary in shape can also finish at different times, even when they go into the oven together.
How Long to Cook Chicken Breast at 350°F
Average 6-8-ounce chicken breasts take about 25-35 minutes at 350°F. A lower oven setting gives you a longer window for cooking, but the chicken still needs a doneness check. Let the thickest area guide your decision instead of pulling the dish out at one exact minute.
If you want to bake chicken breasts at a lower temperature, keep the same attention to size and thickness. A timer helps you remember when to start checking. It cannot replace a temperature reading in the thickest part.
Convert the Oven Setting from Celsius
200°C equals 392°F, which is close to, but not exactly, a 400°F setting. Use the nearest timing range as a starting point and check doneness. If your oven offers only Celsius settings, choose the closest setting your controls allow and watch the chicken carefully.
Set your timer for the early end of the range, then check each piece as needed. A thin breast can finish before a thicker one beside it. Begin checking near the early end of a time range when the pieces are thin.
Check Doneness with an Instant-Read Thermometer
The chicken is safely cooked when its thickest part reaches 165°F (74°C). That reading matters more than a browned surface or a set number of minutes. Measure the internal temperature inside the thickest part of each piece.
Use an instant-read thermometer, also called a meat thermometer, for a quick check. Insert the tip into the thickest area from the side, aiming for the center of the meat. Keep the tip away from the baking dish, since contact with the hot dish can affect the reading.
Where to Take the Temperature
Find the thickest section by looking across the breast, not just at its center from above. Slide the thermometer into that area until the sensing tip sits inside the meat. Do not push the tip all the way through or let it touch the pan.
When the breasts differ in size, check each piece rather than testing only one. Smaller pieces can finish before large ones, even if they bake in the same dish. If the reading falls below the safe endpoint, return that piece to the oven and check again.
What the Reading Means
An internal temperature of 165°F (74°C) means the chicken has reached the safe cooking point. The number gives you a clear check that appearance cannot provide. Chicken can look pale or slightly pink for reasons that do not show whether it has reached the right temperature.
Color alone is not a reliable safety check. A golden top may look ready while the center needs more time, and a fully cooked piece may not look deeply browned. The thermometer gives you a direct reading from the meat, so you do not need to guess from its surface.
Check the largest breast individually instead of assuming every piece finished at the same time.
Keep Chicken Breast Juicy
Even cooking, a short rest, and careful timing matter more than a complicated marinade. Brining is optional, while checking the chicken for safe doneness is still required. A loose foil tent during the rest helps hold warmth without trapping too much steam.
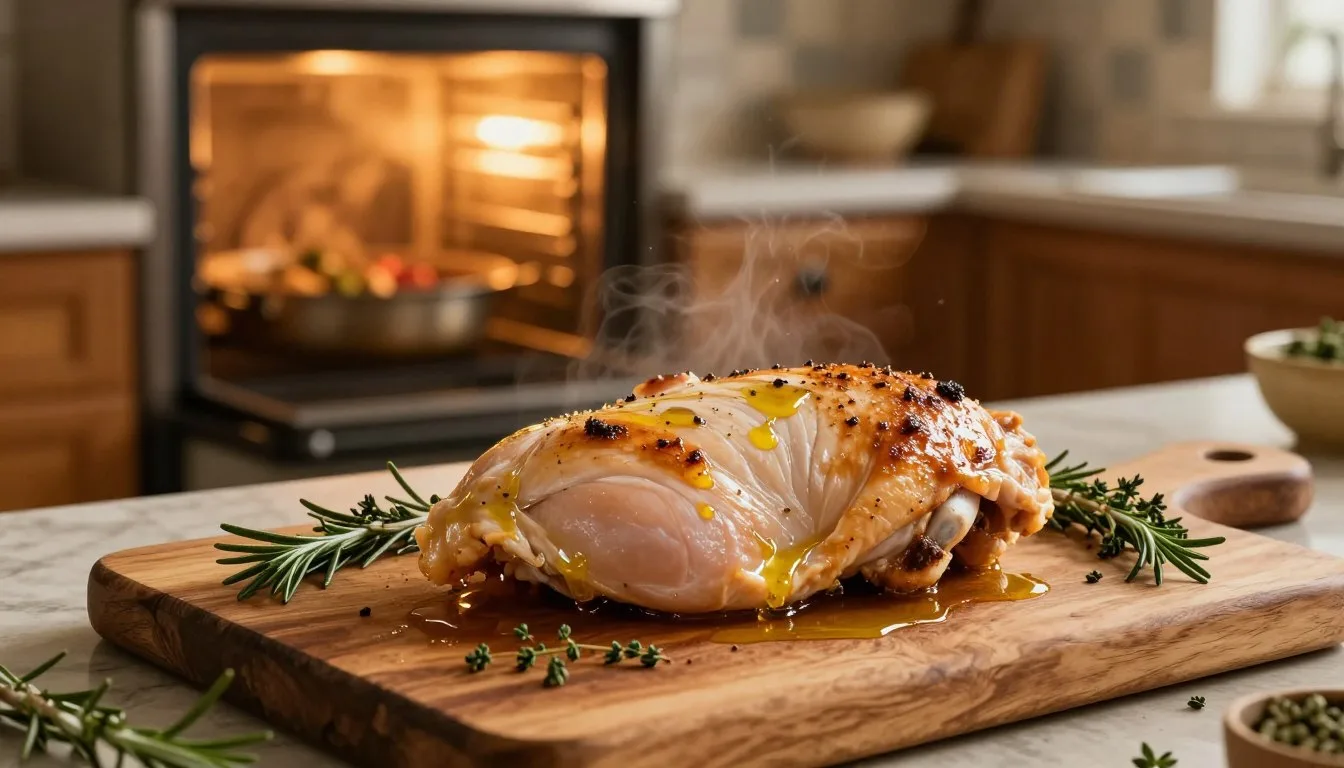
Let baked chicken rest for 5-10 minutes before slicing so its juices have time to settle. Set the dish on a heat-safe surface and loosely cover the chicken with foil. Do not wrap it tightly, which can soften the outside.
Optional Brining for Extra Moisture
A quick brine uses 2 quarts of water and 2 tablespoons of kosher salt. Stir the salt into the water, add the chicken, and refrigerate it for 30 minutes. Do not leave the chicken in the brine for more than 45 minutes.
Brining adds a step, so use it only when it suits your schedule. Keep the bowl in the refrigerator while the chicken sits in the salt water. Before seasoning, remove the chicken and pat it dry with paper towels. A dry surface can brown better than a wet one.
The brine does not replace the safe-temperature check. It changes how you prepare the chicken, not how you know it has cooked through. If you prefer a simple meal, skip the brine and use the recipe as written.
Rest Before Slicing
Rest the cooked chicken for 5-10 minutes before cutting it. During that pause, the meat stays warm while its juices settle. A loose cover protects it from cooling too quickly without sealing in moisture.
Use the rest time to set out plates or finish a side dish. Keep the chicken whole until you are ready to serve it, since cut pieces lose moisture faster. Slice only after the rest so fewer juices run onto the cutting board.
Bake Chicken from Frozen When Needed
Yes, you can bake chicken breast directly from frozen in the oven. Plan for extra time: frozen chicken takes about 50 percent longer than thawed chicken. An 8-ounce frozen breast takes about 30-40 minutes at 400°F.
Separate pieces that are frozen together when you can, so heat can reach each one more evenly. Slightly frozen chicken can also go into the oven, but its cooking time may be uneven. Check the thickest part before serving, rather than judging by the outside.
| State and size | Oven temperature | Approximate time |
|---|---|---|
| Frozen, 8 ounces | 400°F | 30-40 minutes |
| Thawed, 6-8 ounces | 400°F | 20-25 minutes |
| Thawed, 9-12 ounces | 400°F | 25-35 minutes |
Frozen chicken can go straight into the oven, so thawing is not the only option when you need dinner. The longer cooking time gives the center more time to heat through. A large frozen breast may need more time than a smaller one, so use the table as a starting point.
If frozen breasts are stuck together, try to separate them before baking. Pieces touching in a solid block do not cook as evenly as individual breasts. Do not rely on the outside looking done when the center began frozen.
Seasoning Variations for Different Meals
Keep the same baking method and change the flavor to suit the meal. Italian herbs are the most versatile choice for a general dinner because they pair well with many sides. Use a dry blend in place of extra salt when the chicken is already salted.
Dry seasoning gives baked chicken a savory crust without adding a wet coating. Sprinkle a modest amount over the oiled surface so the flavor stays balanced. You can also brush on a thin layer of sauce, but thick coats can cover the chicken and brown unevenly.
Dry Rubs for a Savory Crust
Try one of these four easy directions:
- Italian herbs suit a simple dinner and pair with many meals.
- Cajun seasoning brings a bolder, spicy flavor.
- Lemon pepper gives chicken a bright taste for salads or wraps.
- BBQ seasoning adds a familiar smoky-sweet note to a meal.
Garlic powder and paprika already give the base recipe a savory flavor and warm color. Add a different blend when you want a change, rather than piling several blends onto the same breast. That keeps the seasoning from becoming too strong.
Sauces and Meal-Specific Flavors
A thin coating of sauce can add flavor without hiding the chicken. BBQ sauce works well for a bold meal, while lemon pepper can suit sliced chicken in a salad. Italian herbs are a flexible pick when you want one seasoning for a mixed dinner.
Sugary sauces can brown quickly in the oven. Check the surface as the chicken cooks, and do not let the sauce burn. If the coating darkens before the center is ready, lower the dish in the oven or cover the surface loosely for the remaining time.
Seasoning blends vary, so read the label before adding more salt. The recipe already includes salt, and some blends add plenty of their own. Choose a salt-free blend when the chicken is already salted.
Serve Chicken Breast with Simple Sides
Pair the chicken with a side that matches how you seasoned it. A simple side can turn baked chicken into a full meal, while plain pieces can work as flexible protein for lunch. Choose from roasted vegetables, grains, salad, or a sandwich.
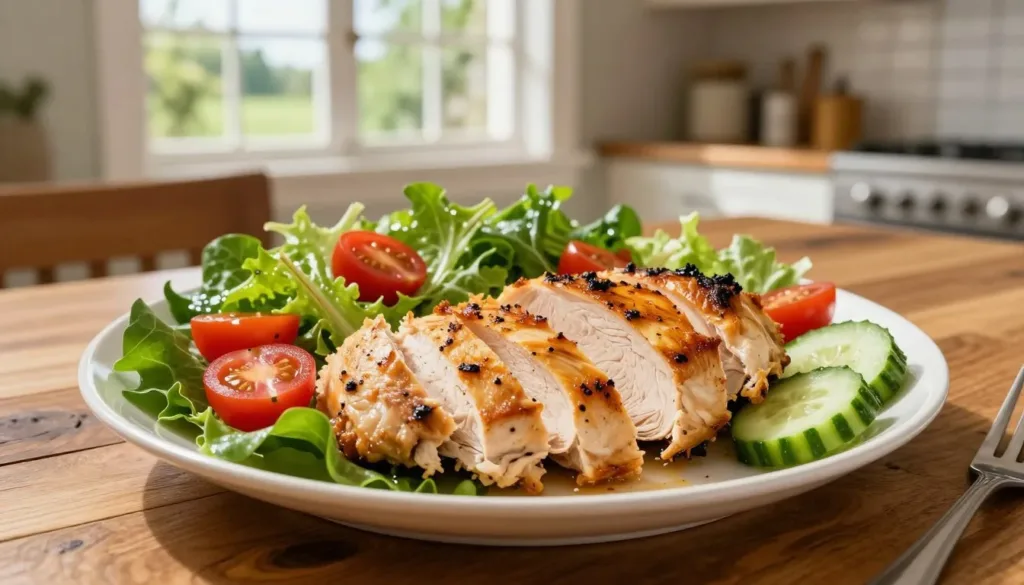
Sliced chicken works well over a salad or grain bowl, while whole pieces make an easy main dish. Shredded chicken fits wraps and sandwiches. Use these four pairings to shape the plate:
- Roasted vegetables for a warm, filling dinner
- Rice or other grains for a simple base
- A crisp salad for a fresh, light side
- Wraps or sandwiches for an easy handheld meal
For a quick plate, serve a whole breast beside roasted vegetables or rice. Cut leftover portions into strips for a salad, or shred the meat before adding it to a wrap. A grain bowl can hold sliced chicken, rice, and vegetables together without needing a separate plate for each item.
Match stronger flavors with simple sides so the plate does not feel too busy. A crisp salad can balance a bold seasoning, while rice can take on juices from the chicken. Slice across the grain for easier-to-eat pieces.
Store, Freeze, and Reheat Leftovers
Store leftovers promptly in an airtight container once the chicken has cooled slightly. Do not leave cooked chicken out for more than 2 hours before refrigerating it. Proper storage helps keep the chicken safe and ready for another meal.
Keep cooked chicken in the refrigerator for 3-4 days, or freeze it for up to 3 months. Pack the pieces in an airtight container once they have cooled, and place them in the refrigerator or freezer promptly. Write the date on the container if you want an easy way to track how long it has been stored.
Refrigerate or Freeze Cooked Chicken
| Method | Handling | Limit or setting |
|---|---|---|
| Refrigerator storage | Cool slightly; seal airtight | 3-4 days |
| Freezer storage | Cool slightly; seal airtight | Up to 3 months |
| Oven reheating | Cover with water or broth | 350°F |
Divide larger amounts into meal-size portions before freezing. That way, you can thaw or reheat only what you plan to serve. Keep the container closed until you need the chicken, and return unused portions to cold storage promptly.
Reheat Gently to Limit Dryness
Reheat chicken in a covered dish in a 350°F oven. Add a splash of water or broth before covering it, which helps keep the meat from drying as it warms. A tight-fitting lid or foil can hold in steam during reheating.
Check the chicken as it warms, since smaller pieces may heat faster than a whole breast. Cut thick pieces into smaller portions when you want them to warm more evenly. Reheat only the portion you plan to eat.
Adjust for Convection Ovens and Chicken Tenders
Convection cooking and thin tenders both call for closer attention to timing than the standard breast method. Convection ovens cook faster, so lower the temperature by about 25°F or begin checking earlier. Chicken tenders usually bake for 15-20 minutes at 400°F, depending on thickness and oven heat.
For a convection oven, make one adjustment at a time: lower the setting by approximately 25°F, or keep the setting and check for doneness sooner. The fan moves hot air around the food, which can speed baking. The thickest piece still needs to reach the same safe endpoint.
To bake chicken strips or tenders, arrange them in one layer in a baking dish or on a baking sheet. Lightly oil or season the pieces, then bake them at 400°F for 15-20 minutes. The final time depends on the thickness of each tender and how your oven heats.
Check a thick tender with an instant-read thermometer rather than relying on its color. Narrow pieces can cook faster than full chicken breasts, so set an early timer. Start checking thin tenders early because their smaller size can shorten the bake.
Conclusion
A simple seasoning, even thickness, and a thermometer make this an easy dinner to repeat. 400°F is a practical oven setting for the recipe, while the shape of each piece helps guide the timing. Use the thermometer reading, not color alone, to decide when the chicken is ready.
Small differences between breasts can change when each one finishes. Check the thickest piece, and give the cooked chicken a brief rest before cutting. This leaves you with a reliable plan for a weeknight meal without extra steps or guesswork.
Preheat the oven, season your chicken, and check the thickest piece before serving.
FAQ
How long do you put boneless skinless chicken breast in the oven?
Can you give me a recipe for chicken strips?
Can I bake frozen chicken breast?
How long does it take to bake frozen chicken breasts at 350 degrees?
Do you cover chicken breast when baking?
Ready to master more kitchen favorites? Explore all our tested chicken and beef recipes step by step: Read More
What Did You Think? Rate This Recipe
Absolutely Tender and Packed with Flavor!
I followed this guide step by step and the beef shank came out amazingly tender and full of flavor. The tips on maintaining moisture made all the difference. Highly recommended for anyone trying this cut for the first time!