Mastering Beef Shank with Bone: How to Get Fall-Off-the-Bone Tenderness
Table of Contents
A patient meal can bring deep comfort. Cooking a beef shank with bone transforms a tough, collagen-rich cut into tender, melt-in-your-mouth meat. It is a labor of love that turns a humble ingredient into a centerpiece for any table.
Learning how to cook beef shank with bone requires a new mindset. Use moist heat and let the connective tissues break down fully. Cook at low temperatures long enough for fork-tender meat.
This guide covers each step of the process. You will learn to choose the best pieces, sear them for depth, and master braising, pressure cooking, and slow cooking at home. We also cover sauce finishing and serving tips for professional results.
Key Takeaways
- Choose cuts with a high ratio of connective tissue for the best texture.
- Searing the meat creates a rich foundation of flavor for your sauce.
- Low and slow cooking is essential for breaking down tough fibers.
- Always check for fork tenderness before serving to ensure perfection.
- Resting the meat allows the juices to redistribute for a better bite.
Why Beef Shank with Bone Becomes So Tender
Fall-off-the-bone tenderness comes from the structural makeup of the beef shank with bone. This cut comes from the animal’s leg, which works hard throughout the cow’s life. Constant movement keeps the meat lean but fills it with dense connective tissue.
How the Bone, Marbling, and Connective Tissue Affect Texture
Cooking works its magic inside the collagen fibers. During long, moist cooking, tough connective tissue slowly breaks down into rich, silky gelatin. This creates a luxurious mouthfeel that tenderloin and other premium steaks cannot match.
The central bone also helps create the final texture. As it heats, marrow melts into the braising liquid and adds deep, savory flavor to the sauce. Together, collagen-rich meat and marrow-filled bone make the bone-in beef shank ideal for slow-cooked comfort meals.
Why Low, Slow Cooking Works Better Than High Heat
High heat harms this specific cut. Quick searing or high-temperature roasting tightens the muscle fibers and makes them tough. Use a low and slow method so collagen has time to dissolve.
A gentle simmer keeps the meat moist while the connective tissue softens. This patient method creates a texture where meat pulls from the bone with just a fork.
Choosing Cross-Cut or Whole Bone-In Beef Shank
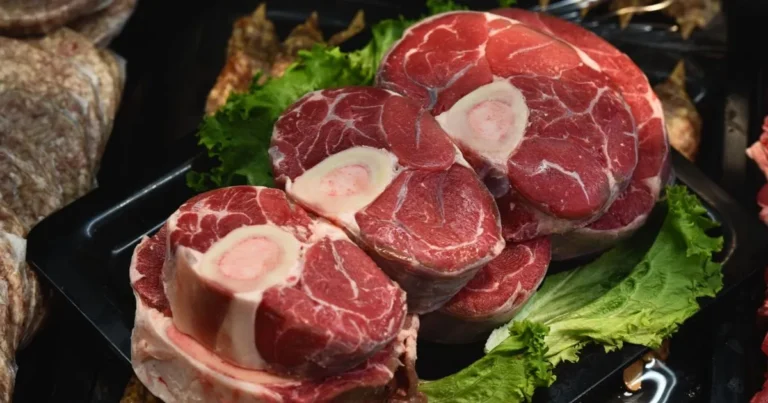
You will typically find two main versions of this cut at the market. Cross-cut shanks, often called osso buco, come in rounds with exposed marrow bones. They suit individual servings and cook more evenly in a standard pot.
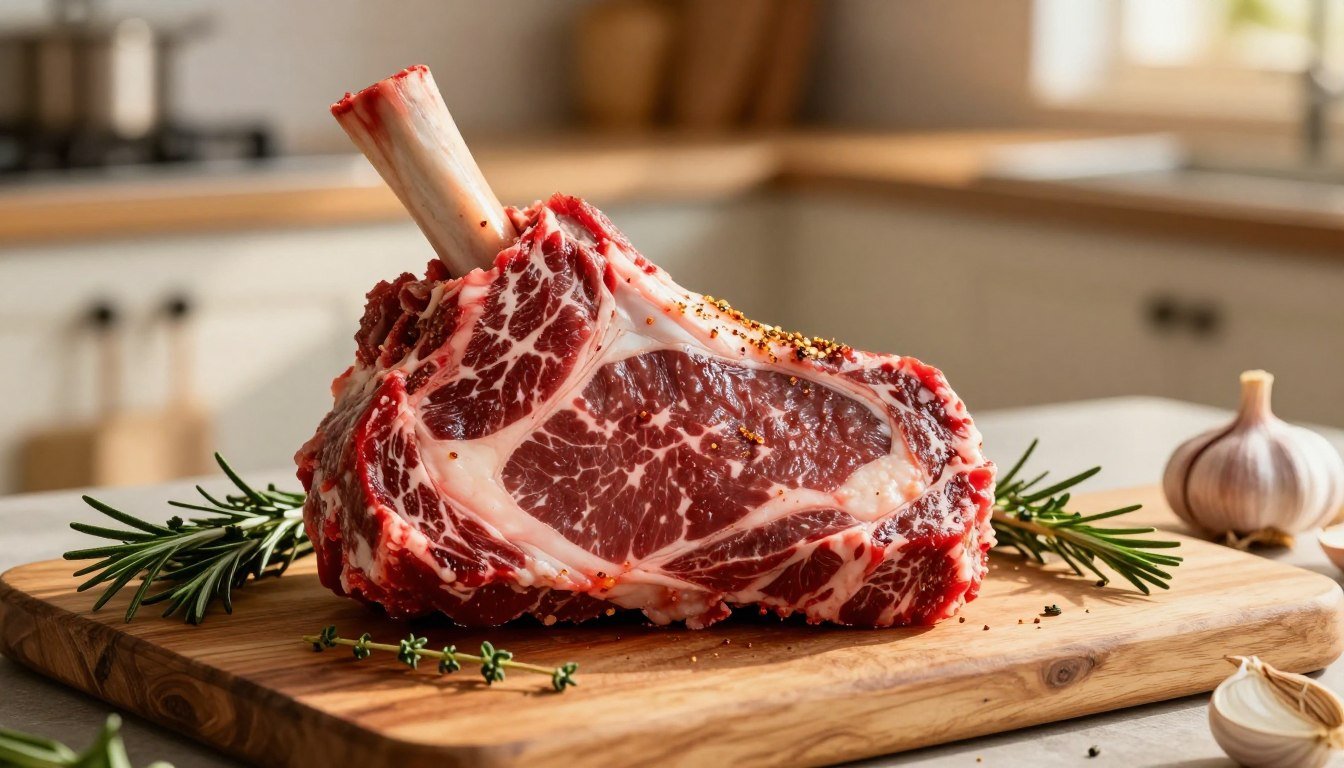
Whole bone-in beef shank pieces are larger and suit long braises when you plan to shred the meat. Choose based on your desired presentation and cooking vessel size.
What to Look for at the Butcher Counter
Look for meat with a bright, deep red color. It should feel firm, with white fat instead of yellow fat. Ask the butcher to trim excessive, gristly silver skin; it breaks down less easily than internal connective tissue.
How Much Beef Shank to Buy Per Person
Planning portions helps create a successful meal. Because the bone adds weight, buy more total weight than you would for boneless cuts. Use this guide to estimate needs based on shank size.
| Shank Size | Meat Yield | Servings Per Piece |
|---|---|---|
| Small (1 lb) | Moderate | 1 Person |
| Medium (1.5 lbs) | High | 1-2 People |
| Large (2+ lbs) | Very High | 2 People |
Gather the Ingredients, Equipment, and Cooking Liquid
Crafting a restaurant-quality dish at home requires quality ingredients and reliable tools. In a braised beef shank recipe, success depends on both.
Essential Ingredients for a Braised Beef Shank Recipe
Begin with fresh, high-quality beef shanks. Choose pieces with deep red meat and plenty of marrow in the center bone. You also need these pantry staples:
- Kosher salt and freshly cracked black pepper for seasoning.
- High-smoke point oil, such as avocado or grapeseed oil, for searing.
- Tomato paste to provide a concentrated, savory depth.
Proper seasoning unlocks the meat’s natural richness. Pat the shanks dry before placing them in the hot pan.
Aromatic Vegetables, Herbs, and Spices That Build Flavor
Aromatics create the foundation of a great braise. Gather classic mirepoix ingredients: onions, carrots, and celery. As they soften, these vegetables release natural sugars and earthy flavors.
Add fresh herbs such as thyme, rosemary, and bay leaves. Whole peppercorns or red pepper flakes add warm complexity that balances the beef’s richness.
Choosing Beef Stock, Wine, Beer, or Tomato-Based Braising Liquid
The liquid shapes your braised beef shank recipe. Beef stock creates a savory, meaty base, while dry red wine adds acidity and tannins that tenderize connective tissue.
Beer offers malty sweetness, while tomato-based liquids add bright, tangy acidity. Mix these liquids to create a flavor profile that suits your taste.
Using a Dutch Oven, Slow Cooker, or Pressure Cooker
Your cooking vessel affects the dish’s texture and moisture. A heavy Dutch oven is ideal for oven braising because it heats evenly and retains moisture.
Which Cooking Vessel Gives You the Best Results
A Dutch oven is traditional, but modern options add convenience. Slow cookers suit hands-off cooking, though they need less liquid because little moisture evaporates. Pressure cookers deliver fall-off-the-bone tenderness in much less time.
Tools for Searing, Deglazing, and Checking Doneness
Use sturdy tongs to turn the meat while searing. A flat-edged wooden spoon or metal spatula helps deglaze the pot and scrape up browned bits called fond.
Keep a reliable meat fork or skewer nearby. Use it to test tenderness before serving your braised beef shank recipe.
Prepare the Beef Shank with Bone Before Cooking
To learn how to cook beef shank with bone like a pro, begin with these key steps. Preparing the meat well helps create the texture and rich flavor you want.
Trim Excess Surface Fat Without Removing Flavor
Inspect the shanks for thick, waxy layers of exterior fat. Trim large, chewy pieces that will not melt during cooking. Keep the connective tissue around the bone because it is crucial for a silky, rich texture.
Season the Shanks Generously With Salt and Pepper
Good seasoning supports cooking beef shank with bone. Coat every side with plenty of kosher salt and freshly cracked black pepper. This step draws out moisture and creates the savory crust found in quality braised dishes.
Dry the Meat for a Better Sear
Pat the meat completely dry with paper towels before placing it in the hot pan. Moisture creates steam and prevents proper browning. A dry surface gives you a deep, caramelized sear and a richer sauce.
Bring the Shanks Toward Room Temperature Safely
Letting the meat rest briefly helps it cook more evenly. Watch the time to protect food safety. Never leave raw beef out for more than two hours because bacteria can grow.
Food-Safety Limits for Handling Raw Beef
Wash your hands and surfaces after handling raw meat. If the kitchen is warm, reduce the resting time to one hour. Keep the meat cool until it reaches the pan to help prevent spoilage.
When to Season in Advance for Deeper Flavor
For best results, salt your shanks up to four hours before you start how to cook beef shank with bone. The salt can then penetrate the muscle fibers. If you cannot wait, season just before searing for effective surface flavor.
| Preparation Step | Primary Benefit | Pro Tip |
|---|---|---|
| Trimming Fat | Improves texture | Keep bone-side tissue |
| Drying Surface | Enhances browning | Use paper towels |
| Advance Salting | Deepens flavor | Wait 4 hours |
| Room Temp | Even cooking | Limit to 2 hours |
Build a Deeply Browned Flavor Base
A deep, savory base is essential for the best beef shank recipe. The Maillard reaction happens when proteins and sugars change under high heat, creating rich, complex flavors.
Step One: Heat the Cooking Vessel and Oil
Choose a heavy-bottomed Dutch oven or a large, wide-sided pot. Add high-smoke-point avocado or grapeseed oil, and heat it until it shimmers without smoking. A hot pan helps ingredients brown as soon as they touch it.
Step Two: Sear Every Meaty Side of the Shanks
Pat the shanks completely dry with paper towels before placing them in the hot oil. Never crowd the pan, or the meat will steam instead of searing. Work in batches, leaving space around each piece for proper browning.
Step Three: Brown the Onions, Carrots, and Celery
After removing the meat, add the mirepoix—onions, carrots, and celery—to the rendered fat. Sauté the vegetables until they turn deep golden brown. This adds natural sweetness that balances the beef’s savory depth.
Step Four: Toast Tomato Paste, Garlic, and Dry Spices
Clear a small space in the pot’s center for the tomato paste, minced garlic, and dry spices. Toast them for about one minute to release essential oils and deepen their flavors. Stir constantly to prevent scorching.
Step Five: Deglaze the Pot and Scrape Up the Fond
Pour in red wine or beef stock to deglaze the pan. Use a wooden spoon to scrape the fond, the flavorful brown bits stuck to the bottom, into the liquid. This concentrated flavor creates a professional-quality sauce.
How to Prevent Burned Fond From Making the Sauce Bitter
“The difference between a rich, dark fond and a bitter, burnt residue is a matter of seconds and heat control.”
If the bits turn black instead of deep mahogany, the heat is too high. If the residue looks burnt, wipe it out with a paper towel before adding liquid. These steps keep your best beef shank recipe balanced and delicious.
Cook Beef Shank with Bone Until Fall-Off-the-Bone Tender
After browning your aromatics, start slowly cooking your beef shank with bone. This step transforms a tough cut into a rich meal.
Step One: Arrange the Shanks in the Braising Liquid
Place the seared shanks in the pot in one layer. Pour the braising liquid around the meat, not over it.
The liquid should reach halfway up the meat’s sides. The bottom braises while the top steams, creating an even texture.
Step Two: Bring the Liquid to a Gentle Simmer
Place the pot on the stove over medium heat. Bring the liquid to a light simmer before moving it to the oven.
Hot liquid starts the cooking beef shank with bone process right away. Avoid a rolling boil, which can toughen the muscle fibers.
Step Three: Cover the Pot and Transfer It to the Oven
Cover the pot with a tight lid to hold in moisture and heat. A heavy Dutch oven works well because it keeps a steady temperature.
Step Four: Maintain a Low Temperature for Several Hours
Steady heat is the key to success with this cut. Use enough heat to break down collagen without drying the meat.
Recommended Oven Temperature and General Timing
Set the oven between 300°F and 325°F. Depending on cut thickness, cooking takes between 2.5 to 4 hours.
Why a Bare Simmer Produces Better Texture Than a Boil
High heat tightens proteins and forces out moisture. Gentle heat slowly melts connective tissue into gelatin, creating a velvety texture.
| Method | Heat Level | Resulting Texture |
|---|---|---|
| Boiling | High (212°F+) | Stringy and dry |
| Simmering | Low (180°F-200°F) | Tender and succulent |
| Slow Braise | Very Low (300°F) | Fall-off-the-bone |
Step Five: Check Tenderness With a Fork or Skewer
When cooking ends, test the meat for doneness. A fork or skewer should enter the thickest part with zero resistance.
How to Tell When Collagen Has Fully Broken Down
If the fork meets resistance, the collagen has not changed into gelatin. Cook the meat in 30-minute steps until it feels soft and yields fully.
Why Internal Temperature Alone Does Not Determine Doneness
Internal temperature does not reliably show doneness in braised dishes. Meat may reach 165°F quickly yet stay tough until connective tissue dissolves.
Judge the physical texture of the beef shank with bone instead of relying on a thermometer.
Adapt the Method for a Slow Cooker or Pressure Cooker
Your appliance choice changes cooking time and liquid needs for a slow cooker beef shank with bone. Traditional oven braising works well, but modern tools help busy home cooks. Knowing how each device handles connective tissue helps you get tender results.
Slow Cooker Beef Shank with Bone Method
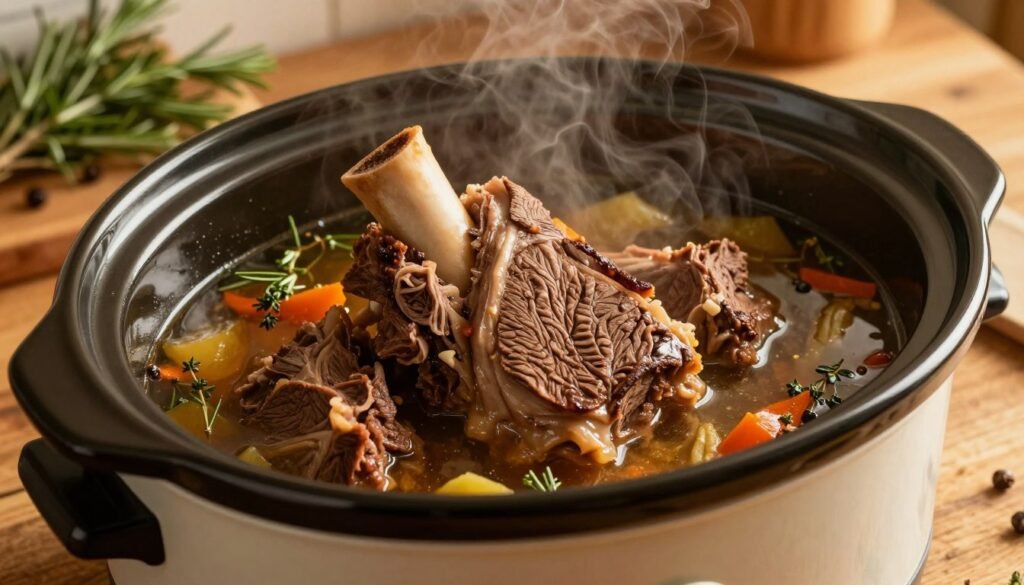
A slow cooker beef shank with bone setup needs a different plan than oven cooking. These sealed appliances hold moisture better than a Dutch oven.
How to Sear Before Adding the Shanks to the Cooker
Always sear the meat in a heavy skillet before adding it to the slow cooker. This creates a flavor-packed crust that moist cooker heat cannot produce alone. Dry the meat before adding it to hot oil for a deep, golden-brown color.
Choosing the Low Setting and Adjusting the Liquid
Choose the low setting for steady results. A slow cooker loses less liquid, so reduce the total braising liquid by about one-third. This keeps the finished sauce from becoming thin or watery.
Pressure Cooker Method for Faster Tenderness
Pressure cookers use high-temperature steam to break down collagen faster. Use this method when you want buttery, tender meat in less time.
How to Account for Natural Pressure Release
Let pressure release naturally instead of using the quick-release valve. This lets meat fibers relax, protecting texture and keeping beef from becoming stringy. The gentle transition helps preserve the shank’s structure.
Reducing the Sauce After Pressure Cooking
After cooking, the sauce may be too thin. Carefully remove the shanks, then simmer the liquid in an open pot until it thickens as desired. This concentrates flavor and creates a rich, glossy glaze.
How Cooking Times Change With Shank Size and Thickness
The meat’s size and thickness affect cooking time with any appliance. Larger, thicker shanks contain more connective tissue, which needs extra time to become gelatin. Adjust the timer for each cut’s weight and thickness.
| Method | Heat Source | Liquid Volume | Typical Time |
|---|---|---|---|
| Slow Cooker | Low Heat | Reduced | 6-8 Hours |
| Pressure Cooker | High Steam | Standard | 45-60 Minutes |
| Oven Braise | Radiant Heat | Generous | 3-4 Hours |
Finish the Braising Liquid and Make a Rich Sauce
Turning your cooking liquid into a rich, glossy sauce elevates any braised beef shank recipe. After hours of slow cooking, the pot holds concentrated flavor, gelatin, and savory notes worth showcasing.
Remove Excess Fat From the Surface
Before refining the sauce, address the fat layer that has risen to the top. Use a wide spoon or fat separator to remove it carefully. This step keeps the final sauce clean and elegant instead of greasy.
Strain or Keep the Aromatics in the Finished Sauce
Choose between a smooth, refined sauce and a rustic, hearty one. For a silky texture, strain the liquid through a fine-mesh sieve and discard the softened vegetables. Keep the vegetables for a thicker, textured sauce that highlights ingredients in your braised beef shank recipe.
Reduce the Liquid Until It Coats a Spoon
Return the pot to the stove and reduce the liquid over medium-high heat. Cook until the sauce coats the back of a spoon. This shows the sauce has concentrated, with deeper beef flavor and a glossy finish.
Balance Salt, Acidity, Sweetness, and Richness
Taste the sauce often to keep its flavors balanced. If it feels too heavy, add ingredients that cut through its richness.
Using Vinegar, Lemon, or Wine to Brighten the Sauce
Add red wine vinegar, fresh lemon juice, or dry red wine for brightness. These acidic ingredients lift the beef’s deep, savory flavor and make the sauce more vibrant. Start with a small amount, then add more to match your taste.
Thickening Options Without Hiding the Beef Flavor
If the sauce stays thin after reduction, whisk in cornstarch slurry or beurre manié. Avoid a heavy flour-based roux, which can hide the delicate flavors of your braised beef shank recipe. Aim for a light, velvety coating that complements the meat.
| Flavor Issue | Recommended Fix | Impact |
|---|---|---|
| Too Greasy | Skim with spoon | Improves mouthfeel |
| Lacks Brightness | Add lemon juice | Balances richness |
| Too Thin | Reduce or thicken | Better coating |
Return the Shanks to the Sauce Before Serving
Once the sauce is seasoned and thickened, gently return the shanks to the pot. Let them simmer for a few minutes to absorb the final flavors and warm through. This keeps the meat moist and succulent when you serve it.
Turn Bone-In Beef Shank Into Soup or a Complete Meal
Turning a bone-in beef shank into comforting soup is simple and makes the most of your cooking. After the main meal, leftover braising liquid becomes a rich base for a second dish.
Converting the Braising Liquid Into Beef Shank Soup
To make delicious beef shank soup, strain leftover braising liquid to remove large pieces. Add beef stock or water to reach your preferred volume and consistency.
Taste the liquid before adding salt because reducing concentrates its existing flavors. Add vinegar or lemon juice to brighten the broth.
When to Add Potatoes, Beans, Grains, or Pasta
Timing is essential when adding ingredients to soup. Add dried beans or raw grains early, giving them time to soften fully.
Add pasta or quick-cooking grains during the final ten minutes of simmering. This keeps them firm while they absorb the broth’s savory flavor.
How to Keep Vegetables From Becoming Overcooked
Add carrots, celery, or potatoes based on their density. Hard root vegetables need more time, while greens or zucchini belong just before serving.
Watch the pot closely to preserve the vegetables’ texture. Removing the pot from the heat while vegetables remain slightly firm lets residual heat finish cooking them.
Serving the Shanks With Mashed Potatoes, Polenta, or Rice
For a main course, pair the meat with a starch that absorbs the rich sauce. Creamy mashed potatoes or buttery polenta contrast with tender, gelatinous meat.
Steamed rice also balances the strong braising liquid. Prepare the starch separately to control each component’s texture and seasoning.
Adding Fresh Herbs, Gremolata, or Pickled Garnishes
Brighten the dish with fresh parsley or chives. Classic gremolata combines lemon zest, garlic, and parsley, adding a vibrant pop of acidity that cuts through beef’s richness.
Pickled red onions or cornichons add needed crunch and tang. These additions balance the meat’s deep, savory flavor.
Portioning the Meat Around the Bone
Carefully remove the meat from the bone with a fork or tongs. It should fall away easily, so portion it into bite-sized pieces for guests.
How to Handle Marrow and Shredded Meat at the Table
The marrow inside the bone is a culinary delicacy and should not be discarded. Scoop the rich, buttery marrow with a small spoon onto crusty bread or into soup.
If you shredded the meat, divide it evenly among bowls so everyone receives a generous portion. This makes the meal complete and satisfying for everyone.
Troubleshoot Tough, Dry, Greasy, or Bland Results
Whether making hearty beef shank soup or a classic braised dish, common problems have simple solutions. Even skilled home cooks face challenges with complex meals. Do not worry if your first try is imperfect; small adjustments can fix most problems.
What to Do When the Beef Is Still Tough
If the meat feels rubbery or resists your fork, the collagen has not fully broken down. This usually means the cooking time was too short or the temperature was too low. Return the pot to the heat and simmer until the fibers yield easily.
How to Fix Dry Meat Caused by Excessive Heat
Meat often dries out when the liquid boils too hard. Add a splash of warm beef stock or water to fix it. Lower the heat and keep a gentle, steady simmer for the rest of cooking.
How to Correct a Thin, Greasy, or Oversalted Sauce
For a thin sauce, remove the meat and boil the liquid until it reaches your preferred thickness. If the sauce is greasy, skim the surface with a spoon or fat separator. If it is oversalted, add a peeled potato for twenty minutes to absorb extra sodium.
Preventing the Shanks From Drying Above the Liquid
When learning how to cook beef shank with bone, keep the meat covered by liquid. If the shanks stand too tall, rotate them halfway through cooking. You can also press parchment paper directly onto the surface to keep the meat moist.
Safe Storage, Reheating, and Make-Ahead Preparation
Proper handling helps your meal taste just as good the next day. Follow these guidelines to protect its quality and safety:
- Cooling: Transfer leftovers to shallow containers to help them cool quickly.
- Refrigeration: Place the containers in the fridge within two hours of cooking.
- Reheating: Always reheat gently on the stovetop with a little extra liquid.
Cooling and Refrigerating Leftover Beef Safely
Never leave cooked meat at room temperature for more than two hours. Divide large portions into smaller, shallow containers so they cool faster in the refrigerator. This slows bacterial growth and preserves the flavor.
Reheating Without Losing the Fall-Apart Texture
To reheat your beef shank soup or braised shanks, use low heat on the stove. Add a small amount of liquid to keep the meat from drying out. Avoid the microwave because it can toughen connective tissue and spoil the delicate texture.
| Problem | Quick Fix | Prevention |
|---|---|---|
| Tough Meat | Simmer longer | Use lower heat |
| Greasy Sauce | Skim the fat | Trim fat before searing |
| Oversalted | Add potato | Season in stages |
Conclusion
Creating the best beef shank recipe takes patience and care. You can turn tough cuts into succulent meals with a Dutch oven, slow cooker, or pressure cooker.
Your success depends on thorough browning and a balanced braising liquid. Test the meat for tenderness until it reaches a melt-in-your-mouth texture. Choose a rich sauce or hearty soup to elevate this humble cut.
Cooking beef shank with bone rewards your effort with deep, complex flavors. Low, moist heat breaks down collagen and creates a luxurious texture. You have the tools to serve a restaurant-quality meal at home.
Experiment with different aromatics and liquids to create your signature style. Share your results with friends and family as you build your culinary skills. Each time you prepare beef shank with bone, you refine your technique and gain kitchen confidence.