How to Cook Beef Shank: A Simple Guide to Tender, Juicy Meat
Rich, savory aromas can make a meal feel deeply comforting and bring back warm memories. You may remember slow Sunday afternoons when the kitchen felt like the heart of the house. This flavorful cut helps you recreate that warm, nostalgic feeling for your family.
Learning how to cook beef shank does not need to feel intimidating. This simple guide shares the secrets to melt-in-your-mouth results every time. Clear steps help you make a tender dish with deep, complex flavors.
Whether new to cooking or an experienced home chef, this reliable beef shank recipe offers clear timing and expert tips. From choosing the right cut to mastering braising, you can confidently serve a restaurant-quality meal. Begin your journey toward a memorable dining experience.
Key Takeaways
- Understand the best selection criteria for high-quality meat cuts.
- Master the essential braising technique for maximum tenderness.
- Follow a proven, simple method for consistent culinary success.
- Learn professional tips for enhancing natural, savory flavors.
- Discover effective storage and reheating advice for leftovers.
How to Cook Beef Shank: Choosing the Cut and Preparing It
Your tender, flavorful beef shank starts at the butcher counter. Choose the right cut for a dish with ideal texture and deep flavor.
Select the Best Beef Shank for Your Recipe
Bone-In and Boneless Beef Shank Differences
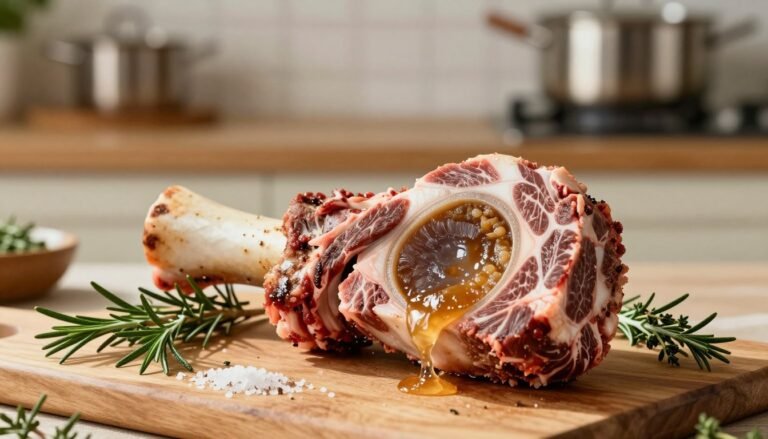
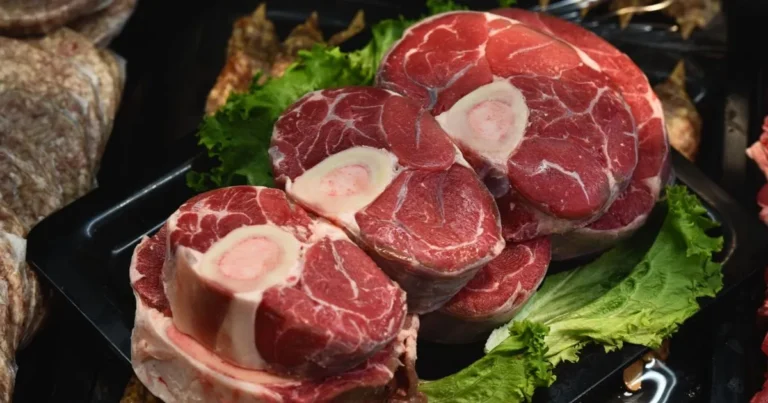
Most traditional recipes use bone-in shanks with a cross-section of leg bone. The marrow melts during cooking and adds richness to your sauce.
Boneless shanks are easier to slice and serve, but they lack marrow’s silky texture. Choose bone-in shanks for the most authentic, traditional result.
How Much Beef Shank to Buy Per Person
Plan portions carefully for a successful dinner. Buy about one pound of bone-in beef shank per person to account for the bone’s weight.
| Cut Type | Best Use | Serving Size |
|---|---|---|
| Bone-In | Braising & Stews | 1 lb per person |
| Boneless | Quick Braises | 0.75 lb per person |
| Trimmed | Leaner Dishes | 0.5 lb per person |
Gather the Ingredients and Cooking Equipment
Best Beef Shank Seasoning for Rich Flavor
The best beef shank seasoning blends kosher salt, cracked black pepper, dried thyme, and rosemary. These herbs complement beef’s deep, earthy flavor without overpowering it.
Add smoked paprika or garlic powder for more depth. Use fresh spices to bring out their full aroma.
Using a Dutch Oven, Slow Cooker, or Roasting Pan
A heavy-bottomed Dutch oven is ideal for braising because it spreads heat evenly. For hands-off cooking, use a slow cooker to soften tough connective tissues over several hours.
Prepare the Beef Before Cooking
Trim Excess Surface Fat and Pat the Meat Dry
Use a sharp knife to remove thick, waxy fat from the outside. Pat the meat completely dry with a paper towel; this is crucial for a deep, golden-brown sear.
Season the Shank Before Searing
Coat the meat generously with seasoning on all sides. Press the spices into the beef so they stay in place while searing.
Step-by-Step Beef Shank Braising Method
Follow this reliable beef shank braising method to turn tough cuts into tender meals. This process uses low, moist heat to soften connective tissue over time. These steps create rich flavor every time.
Step 1: Bring the Beef Shank to the Right Starting Temperature
Remove the meat from the refrigerator about 30 minutes before cooking. Room-temperature beef cooks more evenly. If it stays too cold, the outside may burn before the center heats properly.
Step 2: Sear the Beef Shank Until Deeply Browned
Pat the meat completely dry with paper towels for a better crust. Heat a heavy-bottomed pot or Dutch oven over medium-high heat with a little oil. Sear each side until it becomes deep brown.
Why Browning Builds a More Flavorful Sauce
Browning, called the Maillard reaction, creates complex flavor compounds on the meat’s surface. These browned bits, or fond, stay in the pan and build your sauce. Without browning, the dish will lack depth and richness.
How to Avoid Steaming the Meat in the Pan
Never crowd the pan when searing the meat. Too many pieces lower the temperature and release moisture, causing steaming instead of browning. Work in batches to maintain high heat.
Step 3: Build the Aromatic Braising Liquid
Remove the seared meat and add the vegetables to the same pot. This beef shank braising method balances aromatics and liquids for a savory cooking environment.
Combining Onion, Carrot, Celery, Garlic, and Tomato Paste
Sauté chopped onions, carrots, and celery until soft and slightly caramelized. Stir in the garlic and tomato paste, then cook for another minute. Tomato paste adds mild acidity that balances the beef’s richness.
Choosing Beef Stock, Wine, or Other Braising Liquids
Deglaze the pan with red wine or beef stock, scraping up the browned bits. Combine liquids to suit your preference. Dry red wine adds complexity, while quality beef stock creates a savory base.
Step 4: Cover and Cook the Beef Shank Slowly
Return the meat to the pot and place it in the aromatic base. Cover the pot tightly to trap moisture inside.
Oven Temperature and Braising Time
Place the pot in an oven preheated to 325°F (163°C). This cut usually needs 2.5 to 3 hours of slow cooking. Patience helps create the perfect texture.
How Much Liquid to Add for Even Cooking
Add enough liquid to reach halfway up the meat’s sides. Do not fully submerge the beef, or it may boil instead of braise. Steam under the lid gently finishes the cooking.
Step 5: Check for Fork-Tender Doneness
When cooking ends, check the meat’s texture. It should be very soft and ready to fall off the bone.
“The true test of a perfect braise is not the clock, but the resistance of the meat when pierced with a fork.”
Why Internal Temperature Alone Does Not Determine Tenderness
Internal temperature is not a reliable guide for braised dishes because collagen must break down. Meat may reach a safe temperature quickly but remain tough while connective tissue dissolves. A thermometer can lead to undercooked, chewy results.
How to Test the Meat Without Drying It Out
Gently poke the shank’s thickest part with a fork. If the fork slides in and out easily, the beef shank braising method has worked. If the meat feels tough, cover the pot and cook it another 20 minutes.
Alternative Ways to Cook Beef Shank at Home
Your cooking method depends on your schedule and available equipment. Traditional stovetop braising is classic, but modern appliances offer consistent results with less watching. Choose the technique that best fits your kitchen and lifestyle.
Slow Cooker Beef Shank
Layering the Ingredients for Even Cooking
For a slow cooker beef shank, place aromatic vegetables in the insert first. They create a flavorful bed and keep the meat from sticking. Place the beef shanks on top so circulating heat cooks them evenly.
Low and High Settings, Timing, and Liquid Levels
For the best texture, use the low setting for 8 to 10 hours. When rushed, use high for 4 to 5 hours, but low heat is always preferred to break down tough tissue. Keep liquid just high enough to cover the meat’s bottom third.
Oven Roasted Beef Shank
Using a Covered Roasting Pan for Moisture
An oven roasted beef shank needs a heavy, lidded vessel that recreates braising conditions. A Dutch oven or deep roasting pan with a tight-fitting lid prevents drying. Steady, gentle heat penetrates the shank’s thickest parts.
When to Uncover the Shank for Better Browning
Keep the pan covered for most of cooking to retain moisture. During the final 20 minutes, remove the lid so the surface develops a rich, caramelized crust. This simple step adds depth of flavor and greatly elevates the dish.
Pressure Cooker or Electric Pressure Cooker Method
Adjusting the Liquid and Cooking Time
Pressure cooking saves time without sacrificing tenderness. Because these devices seal in steam, they need less liquid than oven roasting. Cook at high pressure for 45 to 60 minutes, until collagen breaks down into a silky, gelatinous texture.
Using a Natural Pressure Release for Better Texture
Always allow a natural pressure release instead of using the quick-release valve. This prevents meat fibers from seizing because of a sudden temperature drop. This patient approach keeps beef incredibly succulent and easy to pull apart with a fork.
How to Finish, Serve, and Store Tender Beef Shank
When your beef shank is tender, final steps create a restaurant-quality meal at home. These easy beef shank dishes need a balanced sauce that shows the meat’s natural richness. A few extra minutes refining the liquid turns a simple braise into a special meal.
Finish the Braising Sauce
Straining and Reducing the Cooking Liquid
Remove the meat from the pot and set it aside. Strain the remaining liquid through a fine-mesh sieve to remove spent aromatics and herbs. Pour the strained broth into the pan and simmer it over medium-high heat until it reaches a velvety consistency that coats a spoon.
Balancing Salt, Acidity, and Richness
Taste the reduced sauce to see if it needs adjustment. If the sauce tastes heavy, add red wine vinegar or fresh lemon juice to cut through the fat. Add salt or whisk in cold butter for a polished, glossy finish.
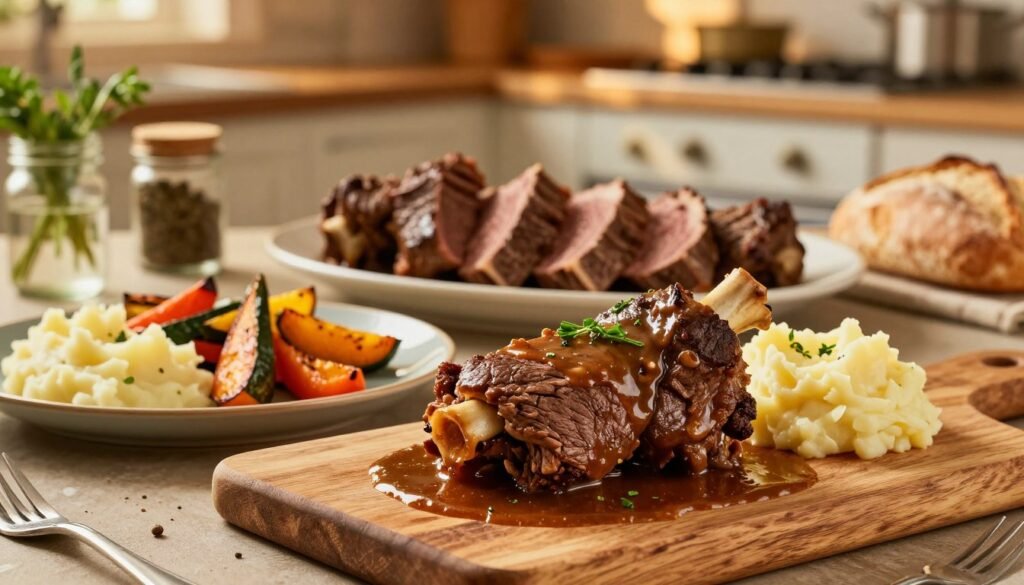
Serve the Beef Shank With Complementary Side Dishes
Mashed Potatoes, Polenta, and Egg Noodles
The best sides soak up the savory braising liquid. Creamy mashed potatoes or soft, buttery polenta make a perfect base for tender meat. Wide egg noodles with parsley offer a delightful texture that pairs well with beef.
Roasted Vegetables, Crusty Bread, and Fresh Herbs
Balance the beef’s richness with roasted root vegetables, such as carrots or parsnips. Serve crusty sourdough bread to mop up every drop of sauce. Garnish the plate with gremolata or chopped parsley for a bright, fresh contrast.
Rest, Refrigerate, and Reheat the Meat Safely
How Long to Rest Beef Shank Before Serving
Let the meat rest for at least 10 to 15 minutes before serving. This time lets the juices redistribute, keeping every bite incredibly succulent. If you rush, the meat may lose moisture too quickly after slicing.
Refrigerator, Freezer, and Reheating Guidelines
Proper storage helps you enjoy leftovers later. Use this guide to manage your easy beef shank dishes safely.
| Storage Method | Temperature | Maximum Duration |
|---|---|---|
| Refrigerator | Below 40°F | 3 to 4 Days |
| Freezer | 0°F or lower | 2 to 3 Months |
| Reheating | Low Heat | Until Steaming Hot |
Reheat the meat on low heat on the stove or in the oven to prevent drying. Add a little water or broth to help maintain the beef’s tender quality.
Beef Shank Cooking Tips for More Flavor and Tenderness
Cooking beef shank takes patience and careful temperature control. These beef shank cooking tips can turn a tough cut into a succulent, melt-in-your-mouth masterpiece. Manage heat and moisture throughout cooking for the best results.
Keep the Cooking Temperature Low and Steady
A tender beef shank technique needs a gentle, steady simmer. High heat tightens muscle fibers and pushes out moisture, leaving dry meat. Keep the liquid barely bubbling.
Use Enough Time to Break Down Connective Tissue
Beef shank is rich in collagen, which supports the muscle. Moist heat must soften this tissue into gelatin over time. If rushed, the meat stays chewy and tough, no matter how good the ingredients are.
Avoid Common Mistakes That Make Beef Shank Tough
Even skilled cooks can make mistakes that ruin the meat’s texture. Avoiding these errors helps your dish reach its full potential.
Cooking at Too High a Temperature
Boiling meat is a common mistake that harms its texture. Keep heat low so collagen melts slowly instead of seizing.
Using Too Little Liquid or Removing the Lid Too Often
Moisture matters for braising, so keep the meat partly submerged. Frequent lid removal releases steam, lowers the internal temperature, and needlessly extends cooking time.
Slicing the Meat Before It Becomes Fully Tender
Patience matters when checking doneness. Slicing too soon wastes the benefit of long cooking because connective tissue remains firm. Test with a fork; it should slide through the meat without resistance.
Adjust the Recipe for Different Seasoning Profiles
After mastering the basic technique, try different flavor profiles. The table shows how ingredients affect the finished dish.
| Flavor Profile | Key Ingredients | Best Serving Method |
|---|---|---|
| Classic Herb | Thyme, Rosemary, Garlic | Over creamy mashed potatoes |
| Smoky Spiced | Smoked Paprika, Cumin | With roasted root vegetables |
| Tomato-Based | Crushed Tomatoes, Oregano | Served over polenta or pasta |
Classic Herb and Garlic Beef Shank
This traditional method uses fresh aromatics to boost the beef’s natural flavor. Whole garlic cloves and woody herbs, such as rosemary, create a deep, earthy braising base.
Smoky, Spiced, and Tomato-Based Variations
For a bolder taste, add smoked paprika or a splash of red wine with crushed tomatoes. These ingredients add acidity and depth, balancing the rich, marrow-filled shank.
Conclusion
Making a restaurant-quality meal at home begins with a high-quality beef shank. Choosing the right cut and preparing it carefully gives you control over dinner. Seasoning and searing the meat build deep, savory flavor.
Slow cooking turns tough connective tissue into succulent, melt-in-your-mouth bites. Use a Dutch oven, slow cooker, or pressure cooker to get these results. Choose the equipment that best fits your kitchen routine.
Focus on the meat’s texture, not just the clock. When beef pulls easily from the bone, your patience has paid off. Serve your masterpiece with creamy mashed potatoes or crusty bread to soak up every drop of rich braising liquid.
Your journey toward perfect beef shank requires simple steps and reliable timing. Enjoy building layers of flavor in your own kitchen. Share the results with friends or family to celebrate a successful home-cooked meal.